For RaspberryPi projects, its best to configure your virtual environment to use site-packages so that modules like RPi.GPIO are still accessible. Modules here require RPi.GPIO. Create the virtual env like so:
virtualenvwrapper will create the virtualenv directory under the WORKON_HOME directory and activate it. Your prompt should indicate
this with the env name in parens–like so:
(env-name-here) user@pi$
Install the rpi package.
Change to the top-level project directory and run
pip install .
Importing the modules
Here’s an example that imports the ussensor module and reads a distance measurement.
[AAAIW 2022] DADFNet: Dual Attention and Dual Frequency-Guided Dehazing Network for Video-Empowered Intelligent Transportation
DADFNet: Dual Attention and Dual Frequency-Guided Dehazing Network for Video-Empowered Intelligent Transportation Yu Guo†, Ryan Wen Liu* , Jiangtian Nie, Lingjuan Lyu, Zehui Xiong, Jiawen Kang, Han Yu, Dusit Niyato
(* Corresponding Author)
AAAI Workshop: AI for Transportation
Abstract:Visual surveillance technology is an indispensable functional component of advanced traffic management systems. It has been applied to perform traffic supervision tasks, such as object detection, tracking and recognition. However, adverse weather conditions, e.g., fog, haze and mist, pose severe challenges for video-based transportation surveillance. To eliminate the influences of adverse weather conditions, we propose a dual attention and dual frequency-guided dehazing network (termed DADFNet) for real-time visibility enhancement. It consists of a dual attention module (DAM) and a high-low frequency-guided sub-net (HLFN) to jointly consider the attention and frequency mapping to guide haze-free scene reconstruction. Extensive experiments on both synthetic and real-world images demonstrate the superiority of DADFNet over state-of-the-art methods in terms of visibility enhancement and improvement in detection accuracy. Furthermore, DADFNet only takes $6.3$ ms to process a 1,920 × 1,080 image on the 2080 Ti GPU, making it highly efficient for deployment in intelligent transportation systems.
Requirement
Python == 3.7
Pytorch == 1.9.1
Flowchart of Our Proposed Method
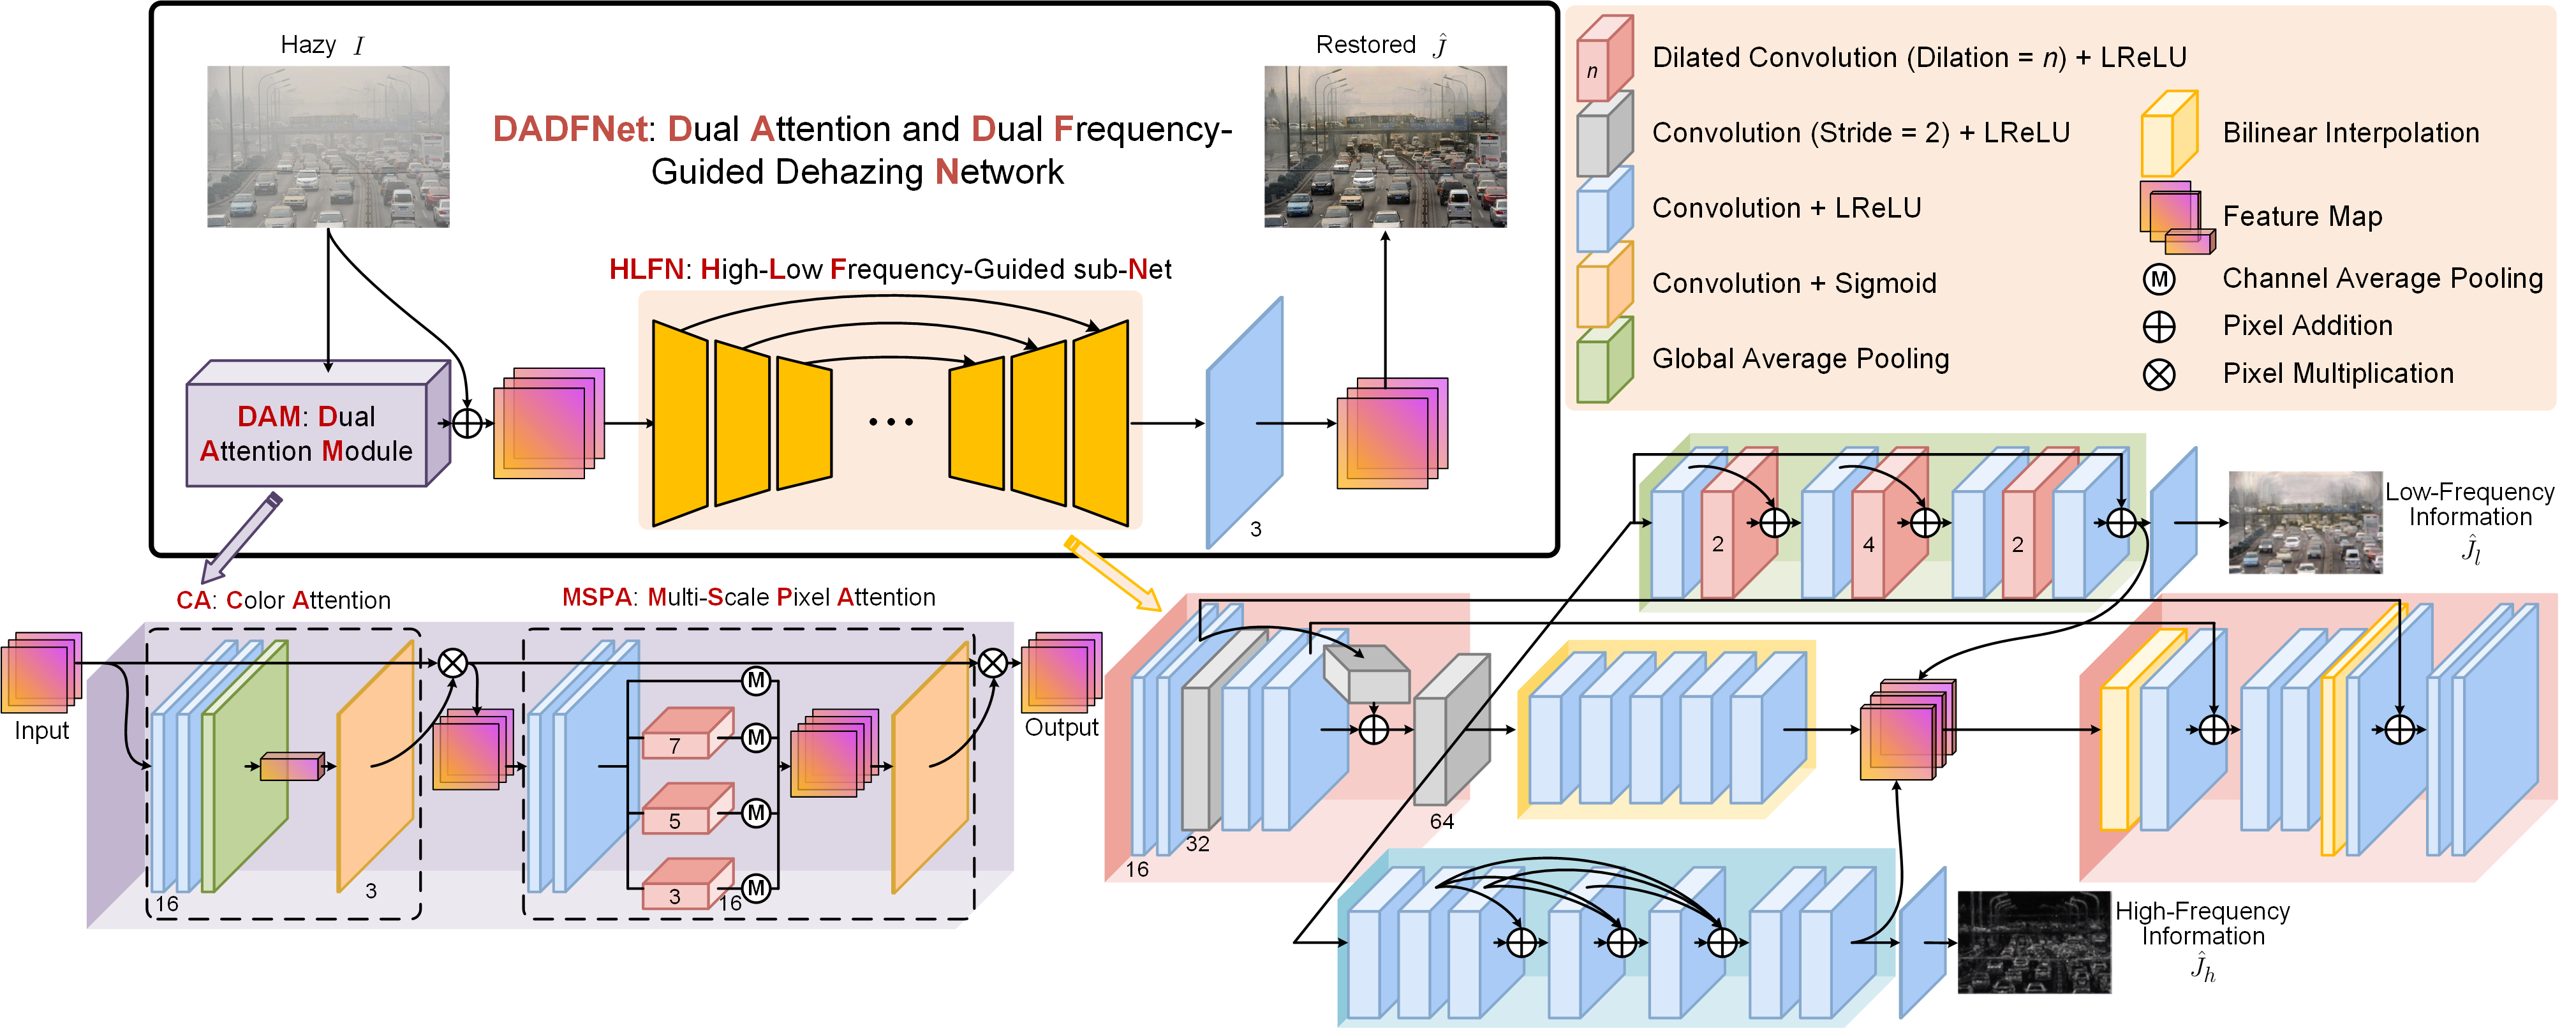
We refer to this network as dual attention and dual frequency-guided dehazing network (DADFNet). The framework of our proposed DADFNet is shown in Fig. 1. In particular, this network mainly consists of two parts, named dual attention module (DAM) and high-low frequency-guided sub-net (HLFN).
The architecture of our proposed dual attention and dual frequency-guided dehazing network (DADFNet). The DADFNet mainly consists of two parts, i.e., dual attention module (DAM) and high-low frequency-guided sub-net (HLFN). Note that LReLU denotes the leaky rectified linear unit function.
Test
This code contains two modes, i.e., nonhomogeneous dehazing (not stated in the article) and normal dehazing.
Normal Dehazing
Put the hazy image in the “input” folder
Run “test_real.py”.
The enhancement result will be saved in the “output” folder.
Nonhomogeneous Dehazing
Put the hazy image in the “hazy” folder
Run “test_real_nonhomogeneous_dehazing.py”.
The enhancement result will be saved in the “output” folder.
Citation
@article{guo2023dadfnet,
  title={DADFNet: Dual attention and dual frequency-guided dehazing network for video-empowered intelligent transportation},
  author={Guo, Yu and Liu, Ryan Wen and Nie, Jiangtian and Lyu, Lingjuan and Xiong, Zehui and Kang, Jiawen and Yu, Han and Niyato, Dusit},
  journal={arXiv preprint arXiv:2304.09588},
  year={2023}
}
We believe in a future in which the web is a preferred environment for numerical computation. To help realize this future, we’ve built stdlib. stdlib is a standard library, with an emphasis on numerical and scientific computation, written in JavaScript (and C) for execution in browsers and in Node.js.
The library is fully decomposable, being architected in such a way that you can swap out and mix and match APIs and functionality to cater to your exact preferences and use cases.
When you use stdlib, you can be absolutely certain that you are using the most thorough, rigorous, well-written, studied, documented, tested, measured, and high-quality code out there.
To join us in bringing numerical computing to the web, get started by checking us out on GitHub, and please consider financially supporting stdlib. We greatly appreciate your continued support!
ENV
Object containing the user environment.
Installation
npm install @stdlib/process-env
Alternatively,
To load the package in a website via a script tag without installation and bundlers, use the ES Module available on the esm branch (see README).
If you are using Deno, visit the deno branch (see README for usage intructions).
The branches.md file summarizes the available branches and displays a diagram illustrating their relationships.
To view installation and usage instructions specific to each branch build, be sure to explicitly navigate to the respective README files on each branch, as linked to above.
Modifications to ENV are local to the process in which ENV is modified.
On Windows systems, environment variables are case insensitive.
In browser environments, ENV is an empty object.
Be careful when modifying environment variables as the environment variable object represents shared state. Accordingly, modifications affect all environment variable consumers.
@stdlib/process-argv: array containing command-line arguments passed when launching the calling process.
Notice
This package is part of stdlib, a standard library for JavaScript and Node.js, with an emphasis on numerical and scientific computing. The library provides a collection of robust, high performance libraries for mathematics, statistics, streams, utilities, and more.
For more information on the project, filing bug reports and feature requests, and guidance on how to develop stdlib, see the main project repository.
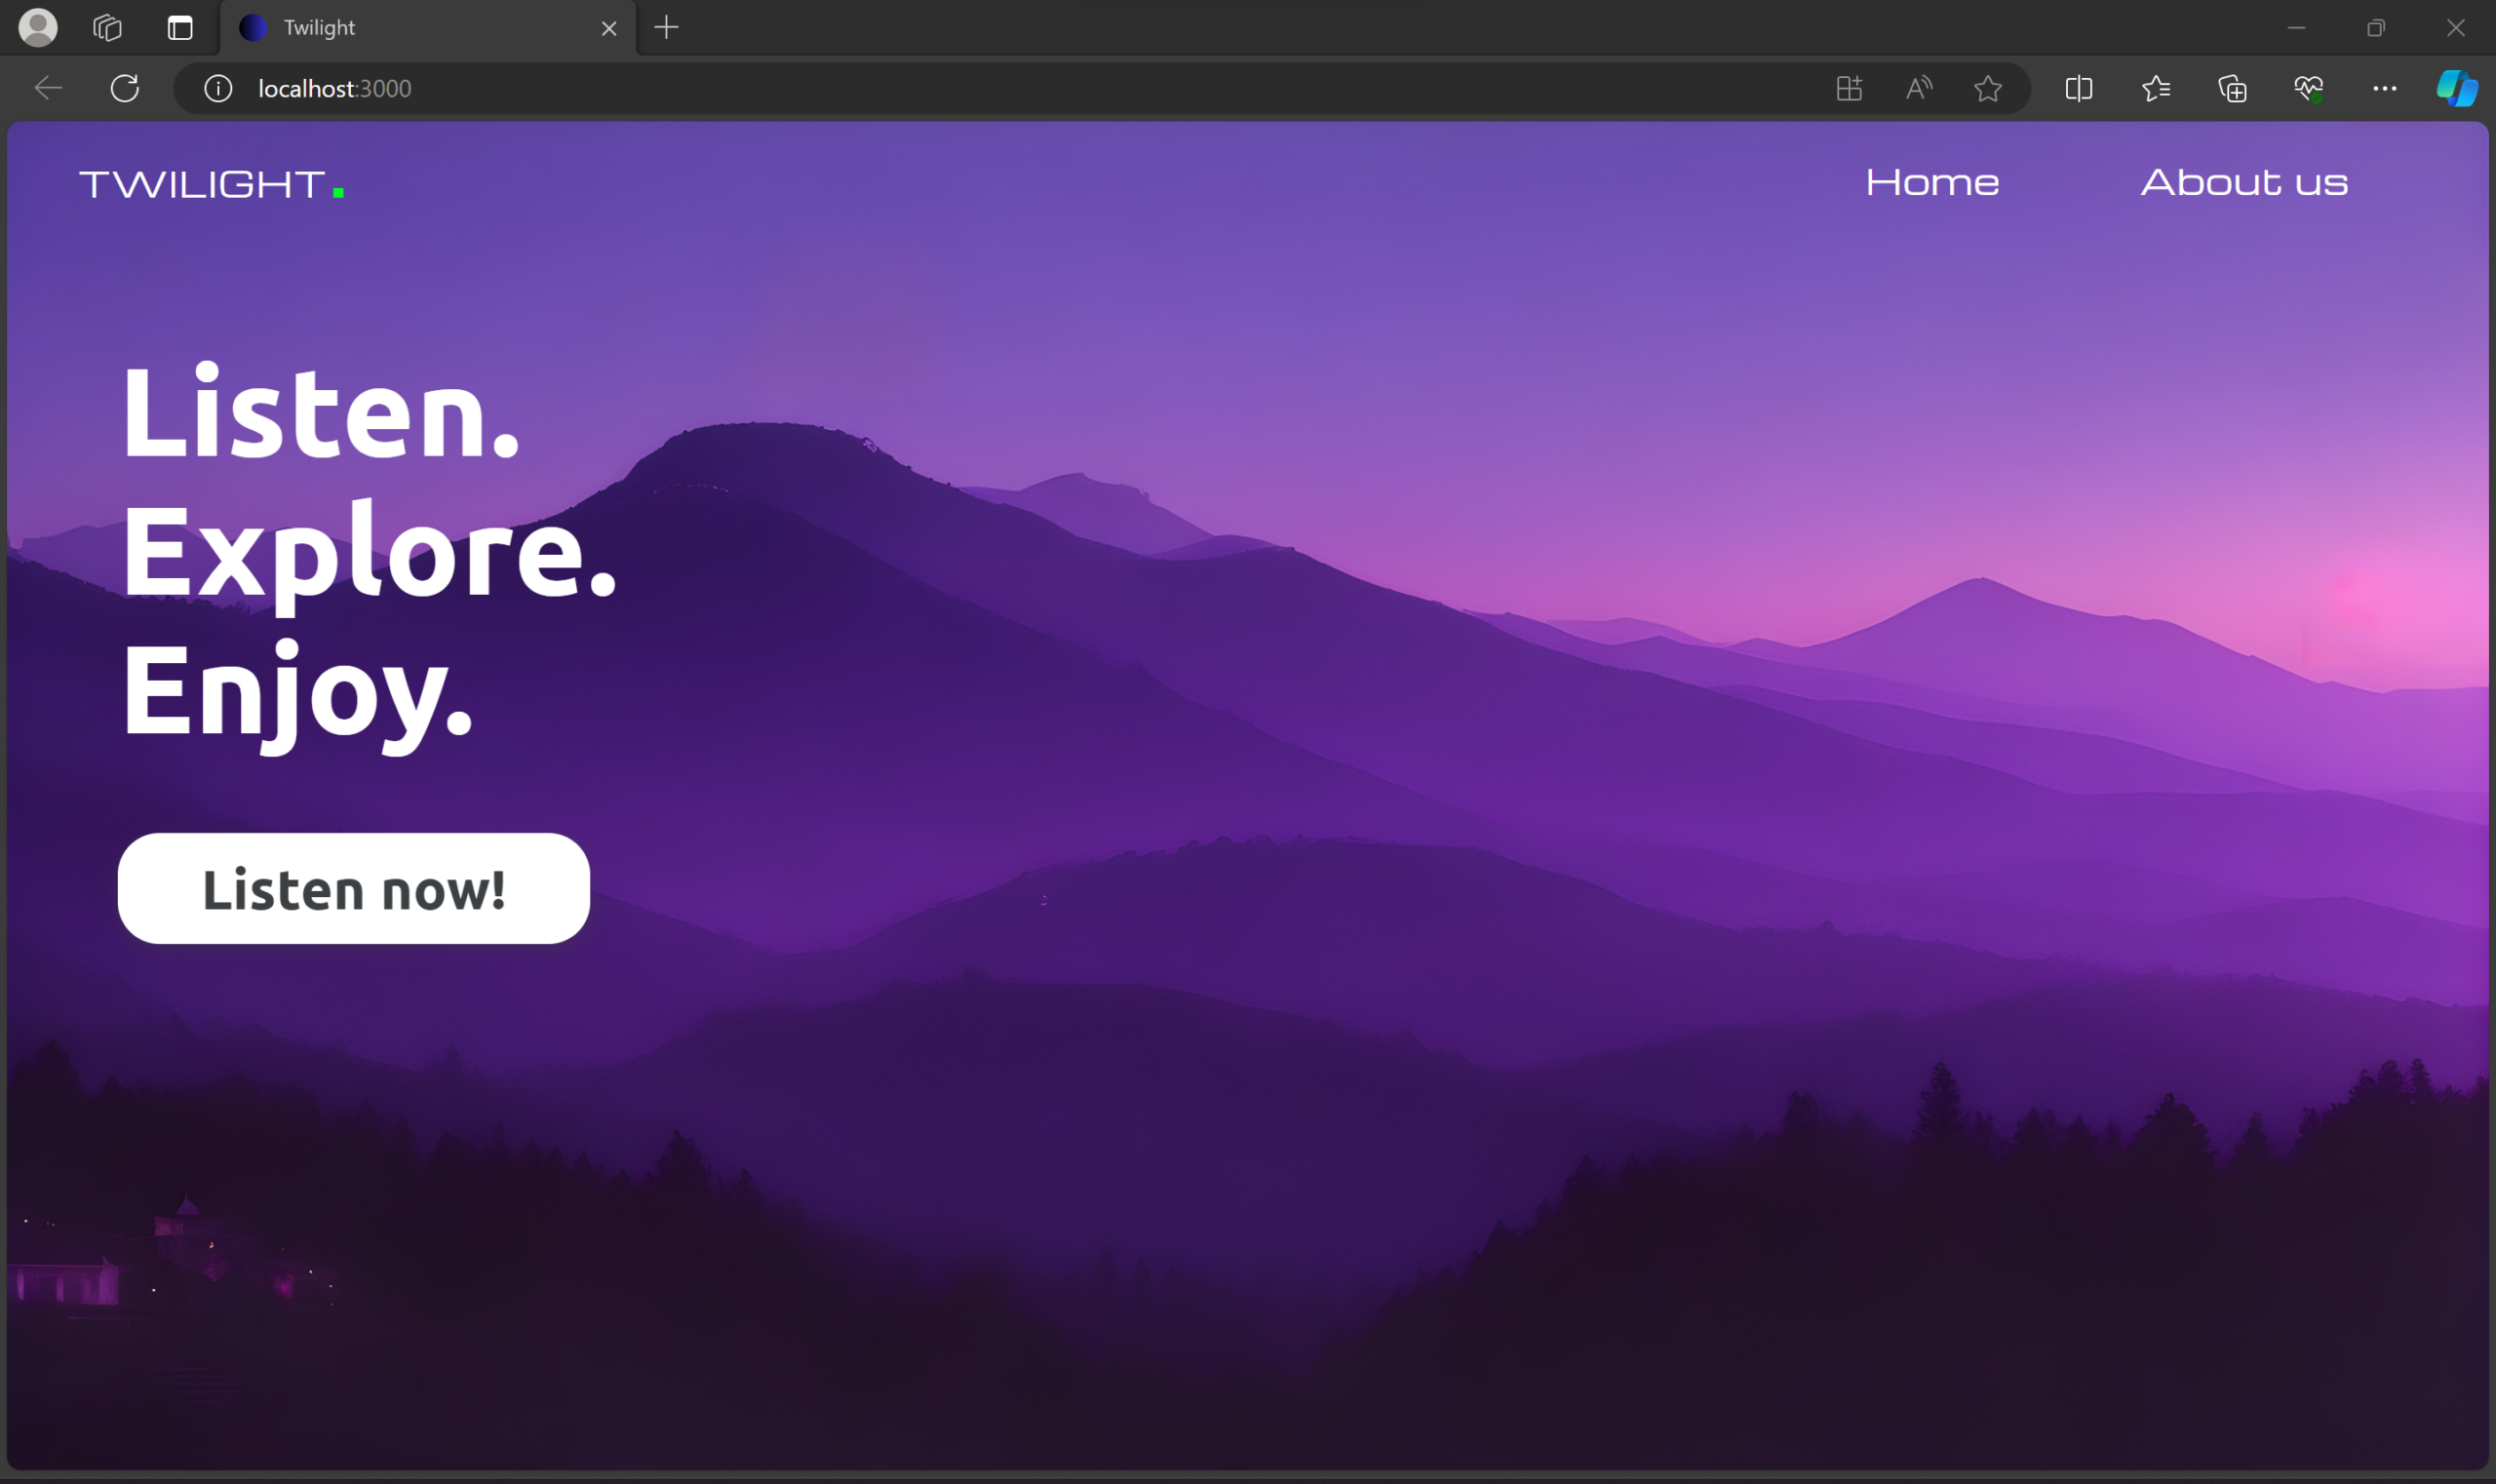
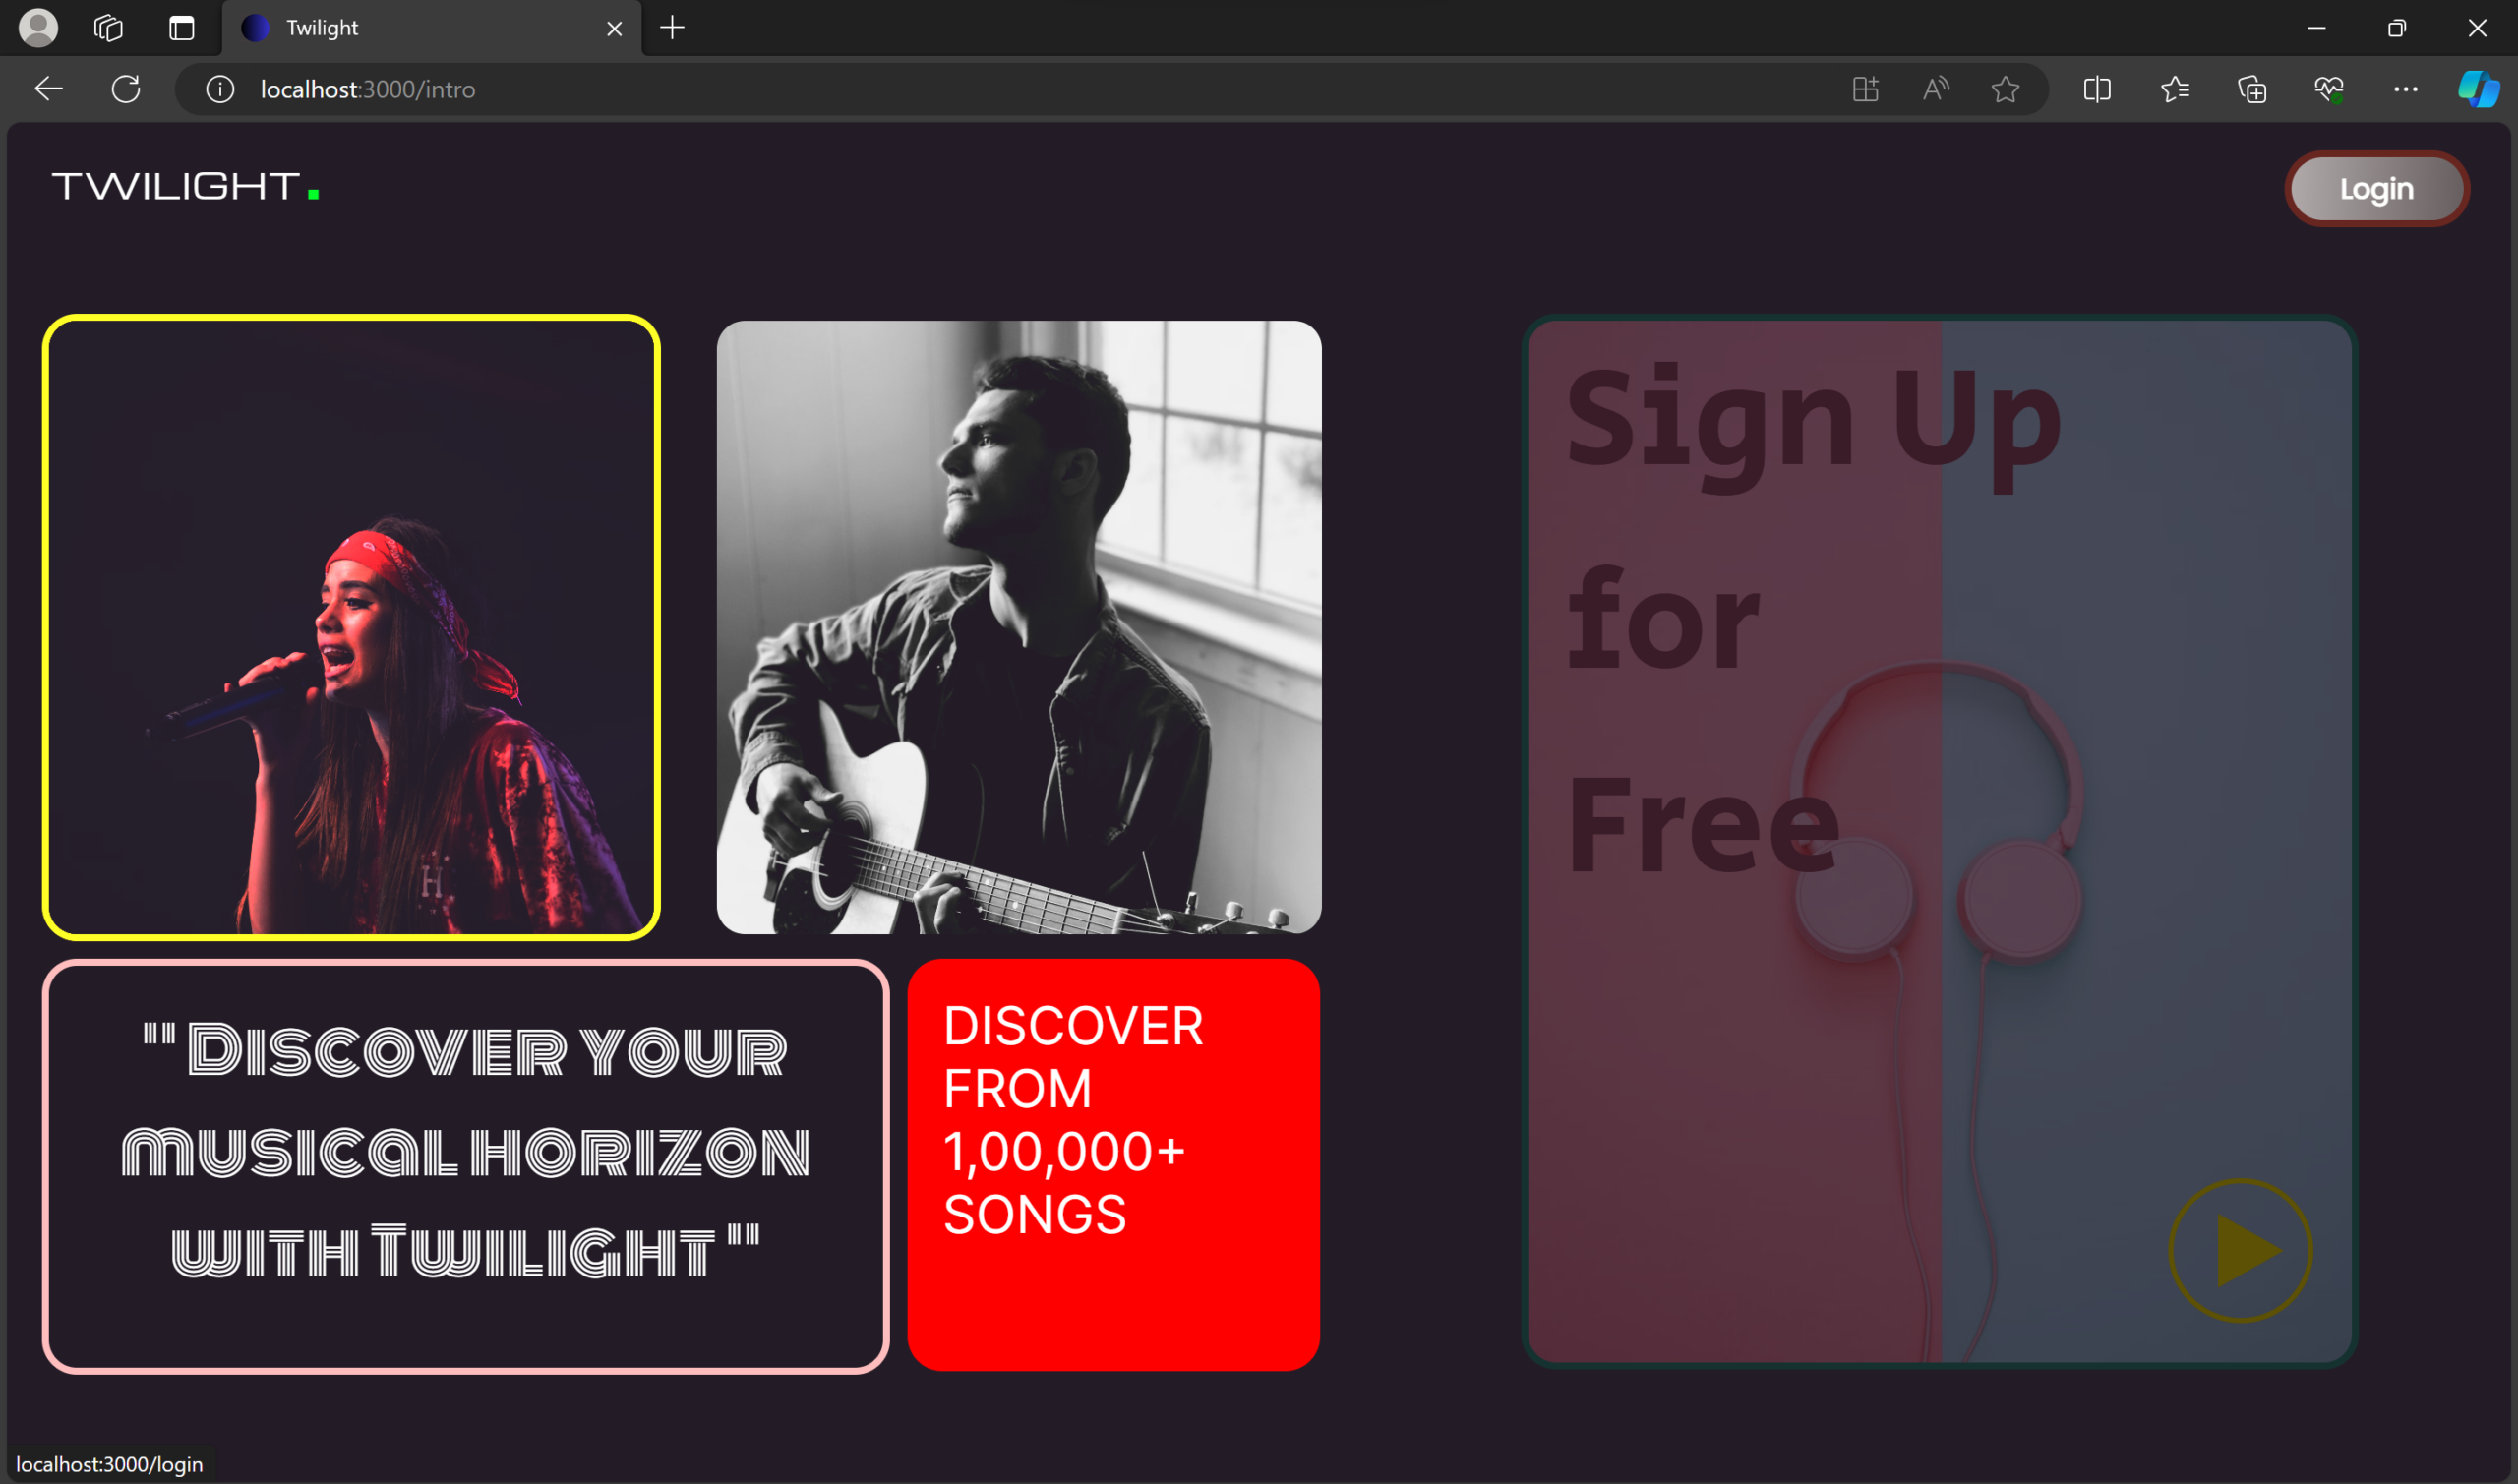
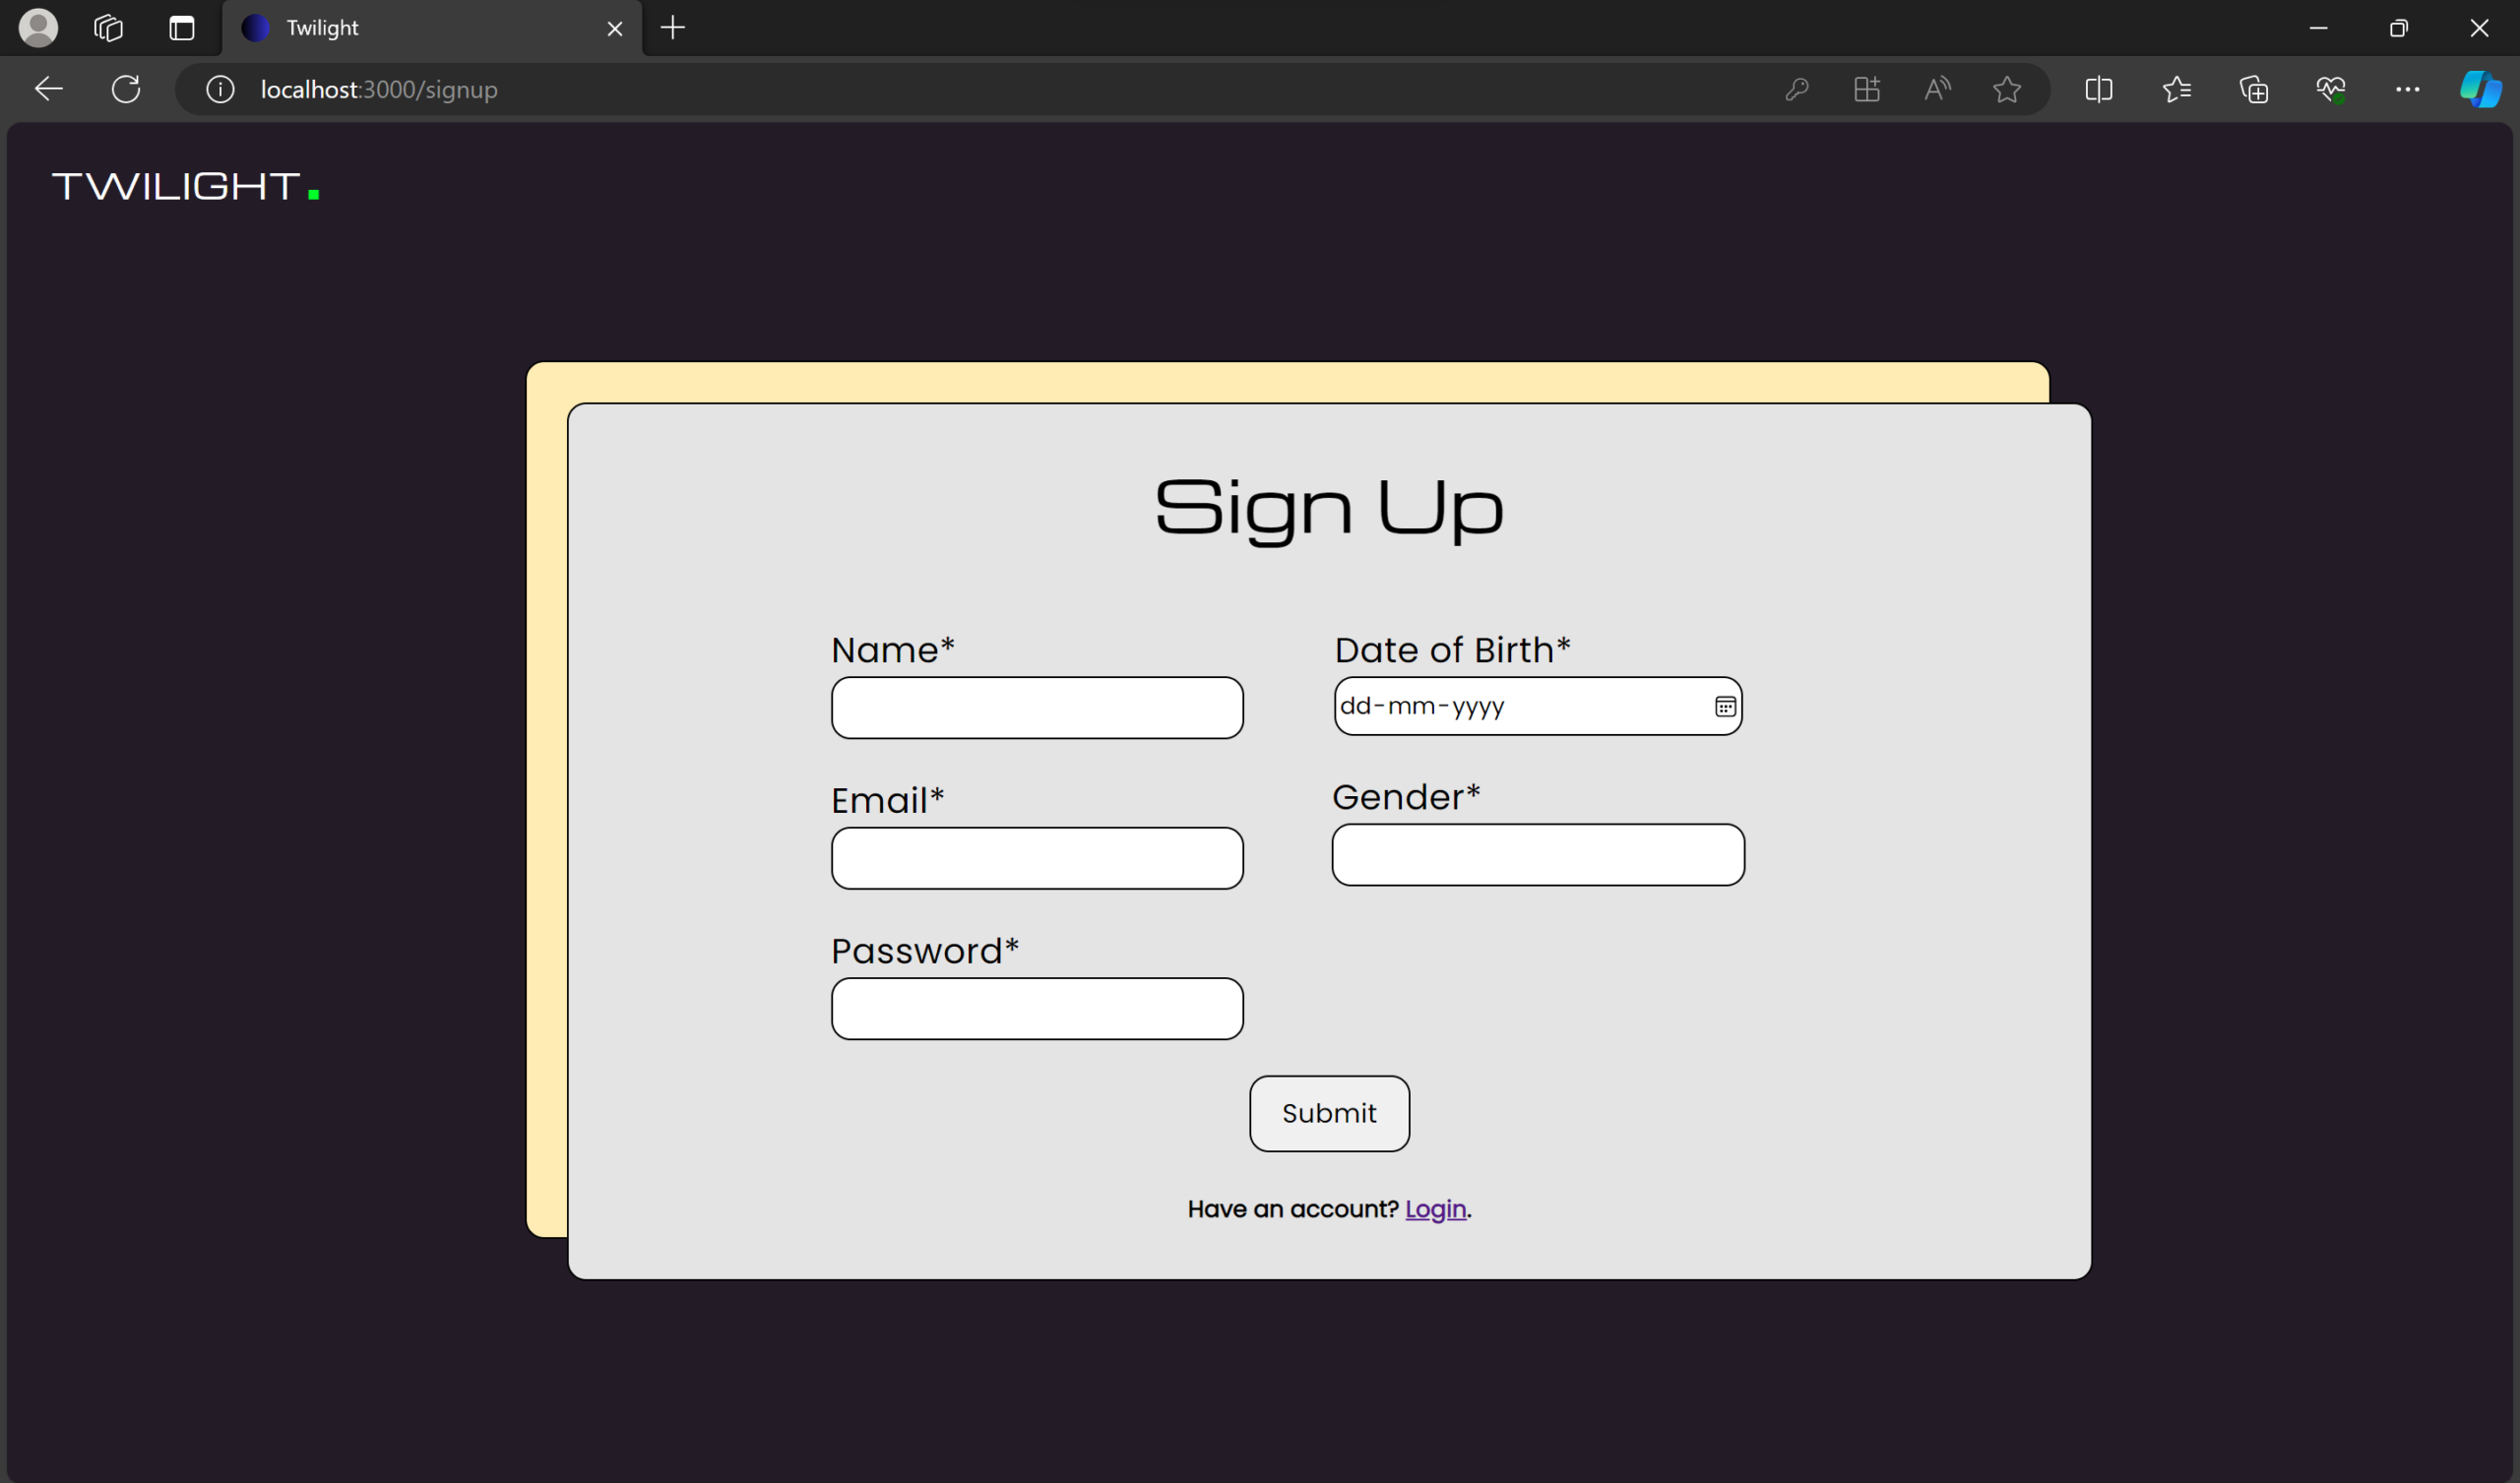
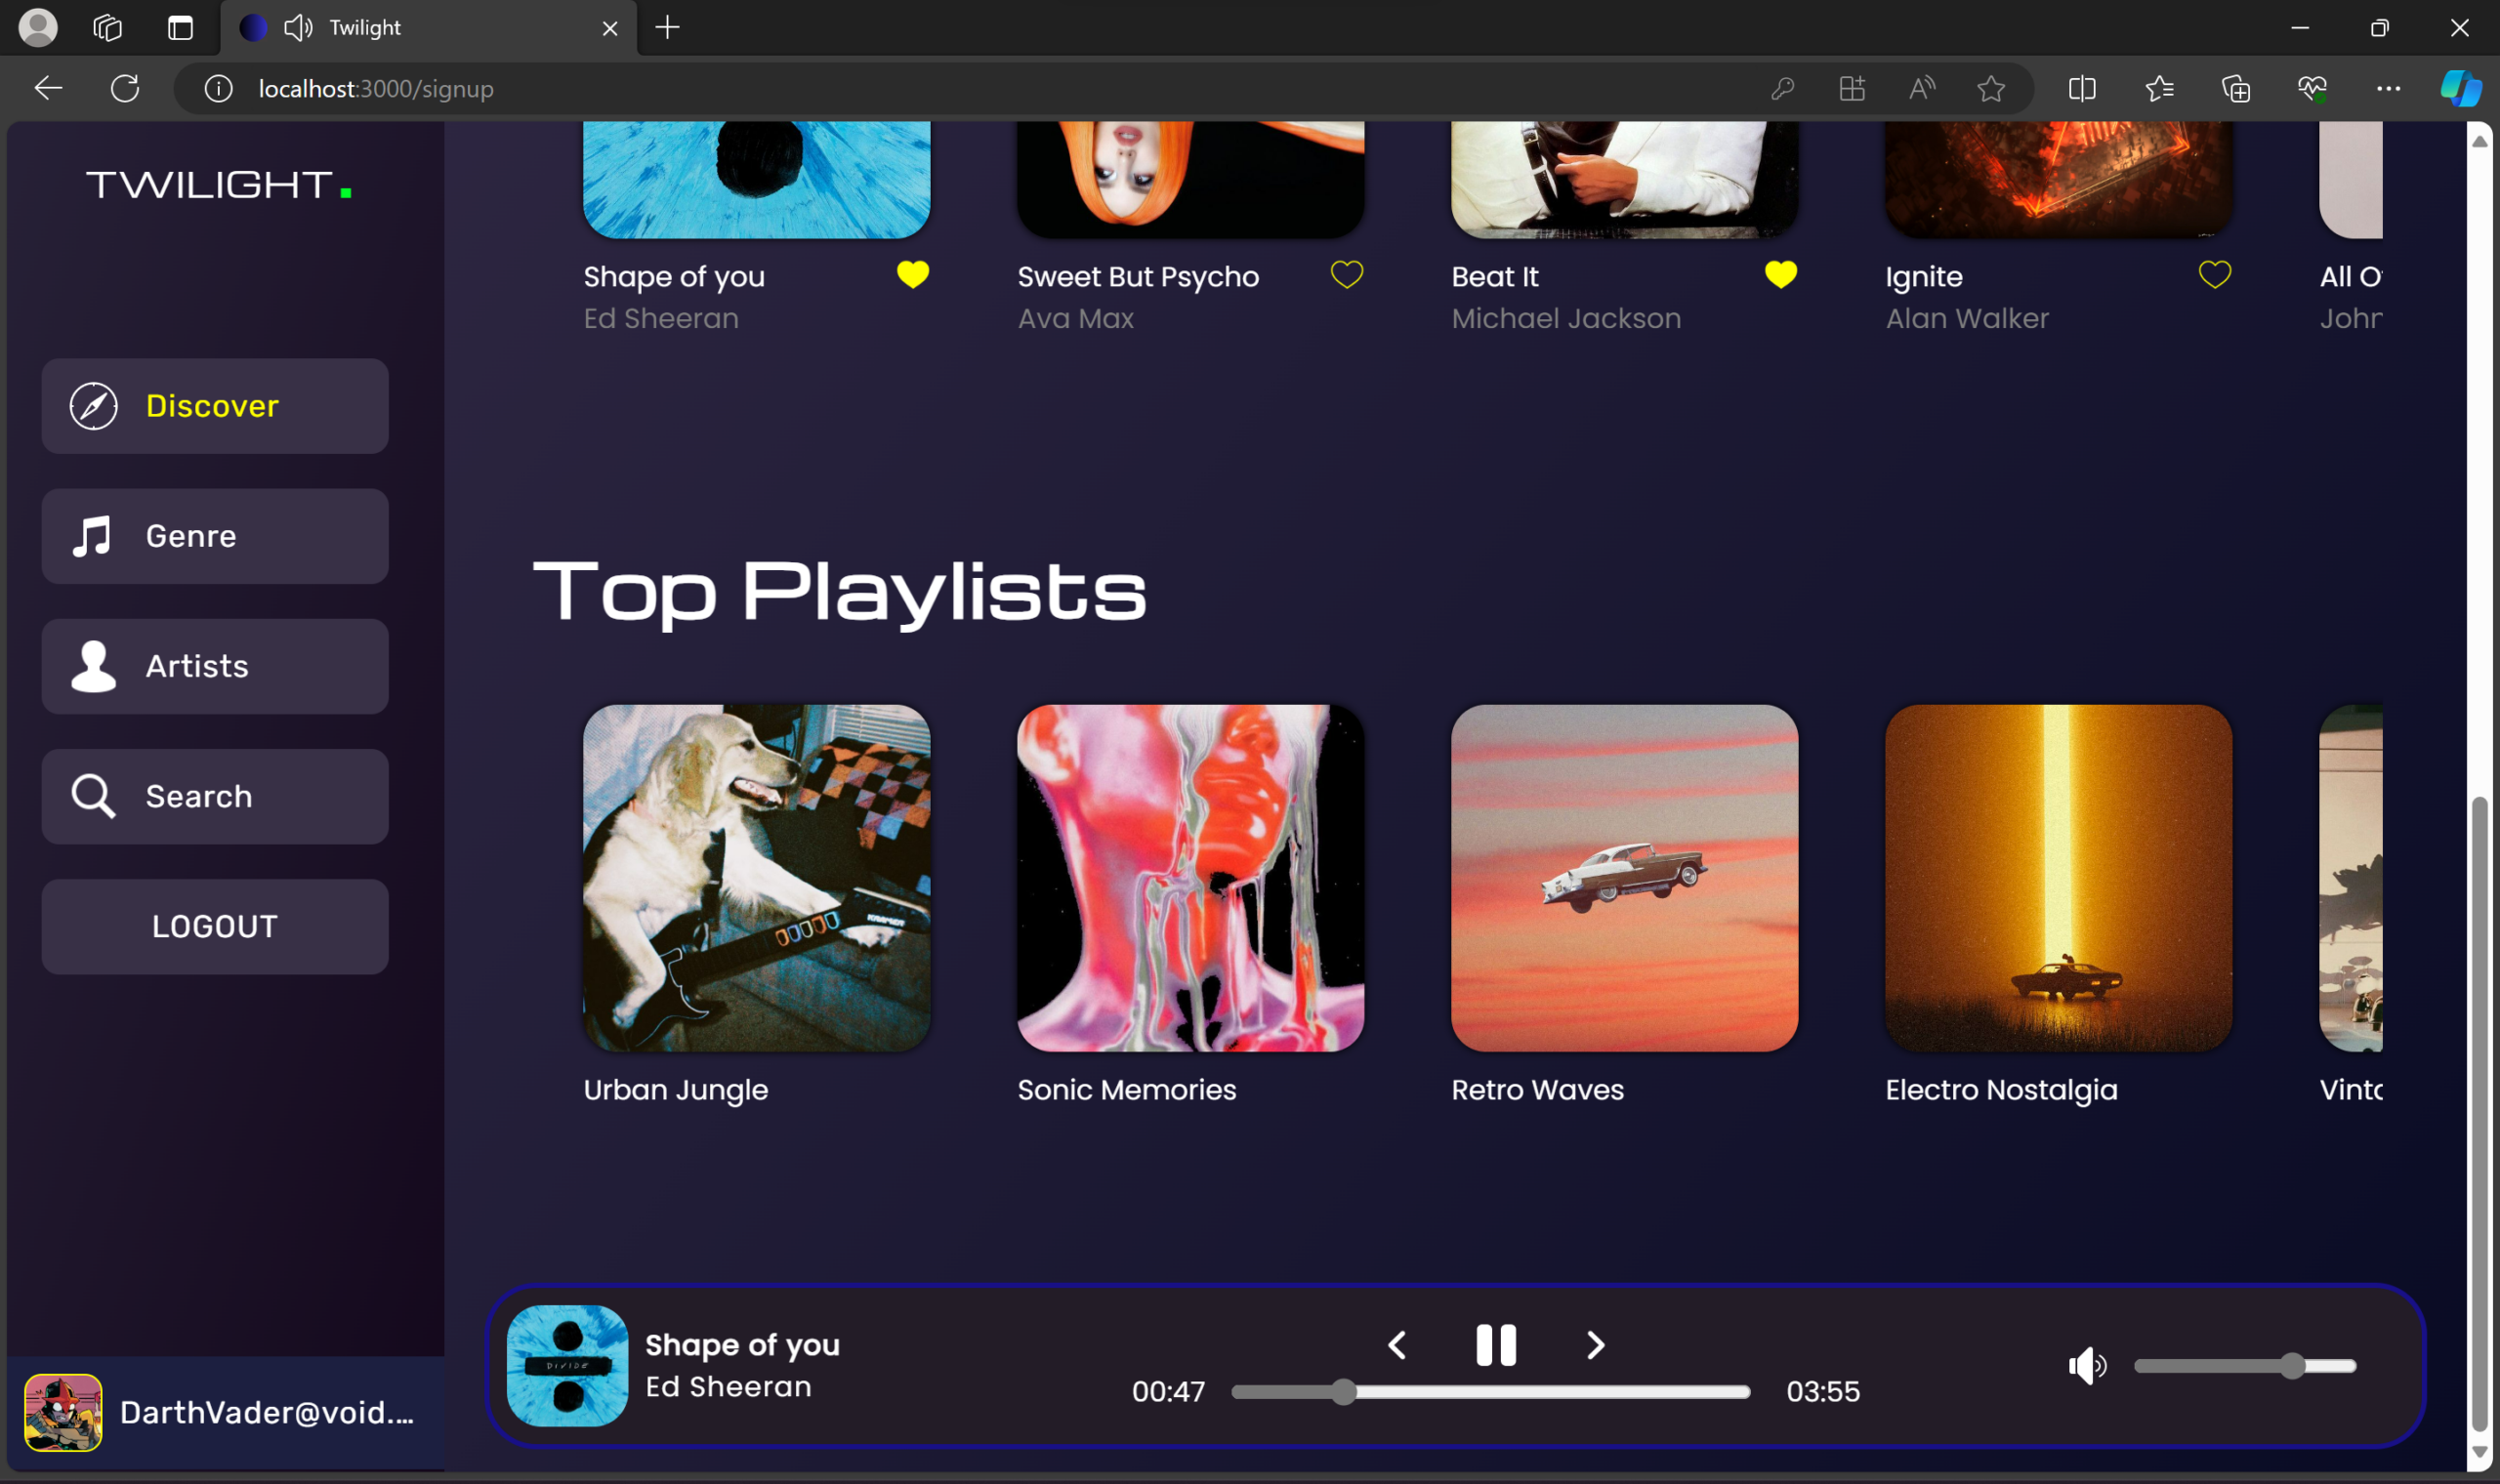
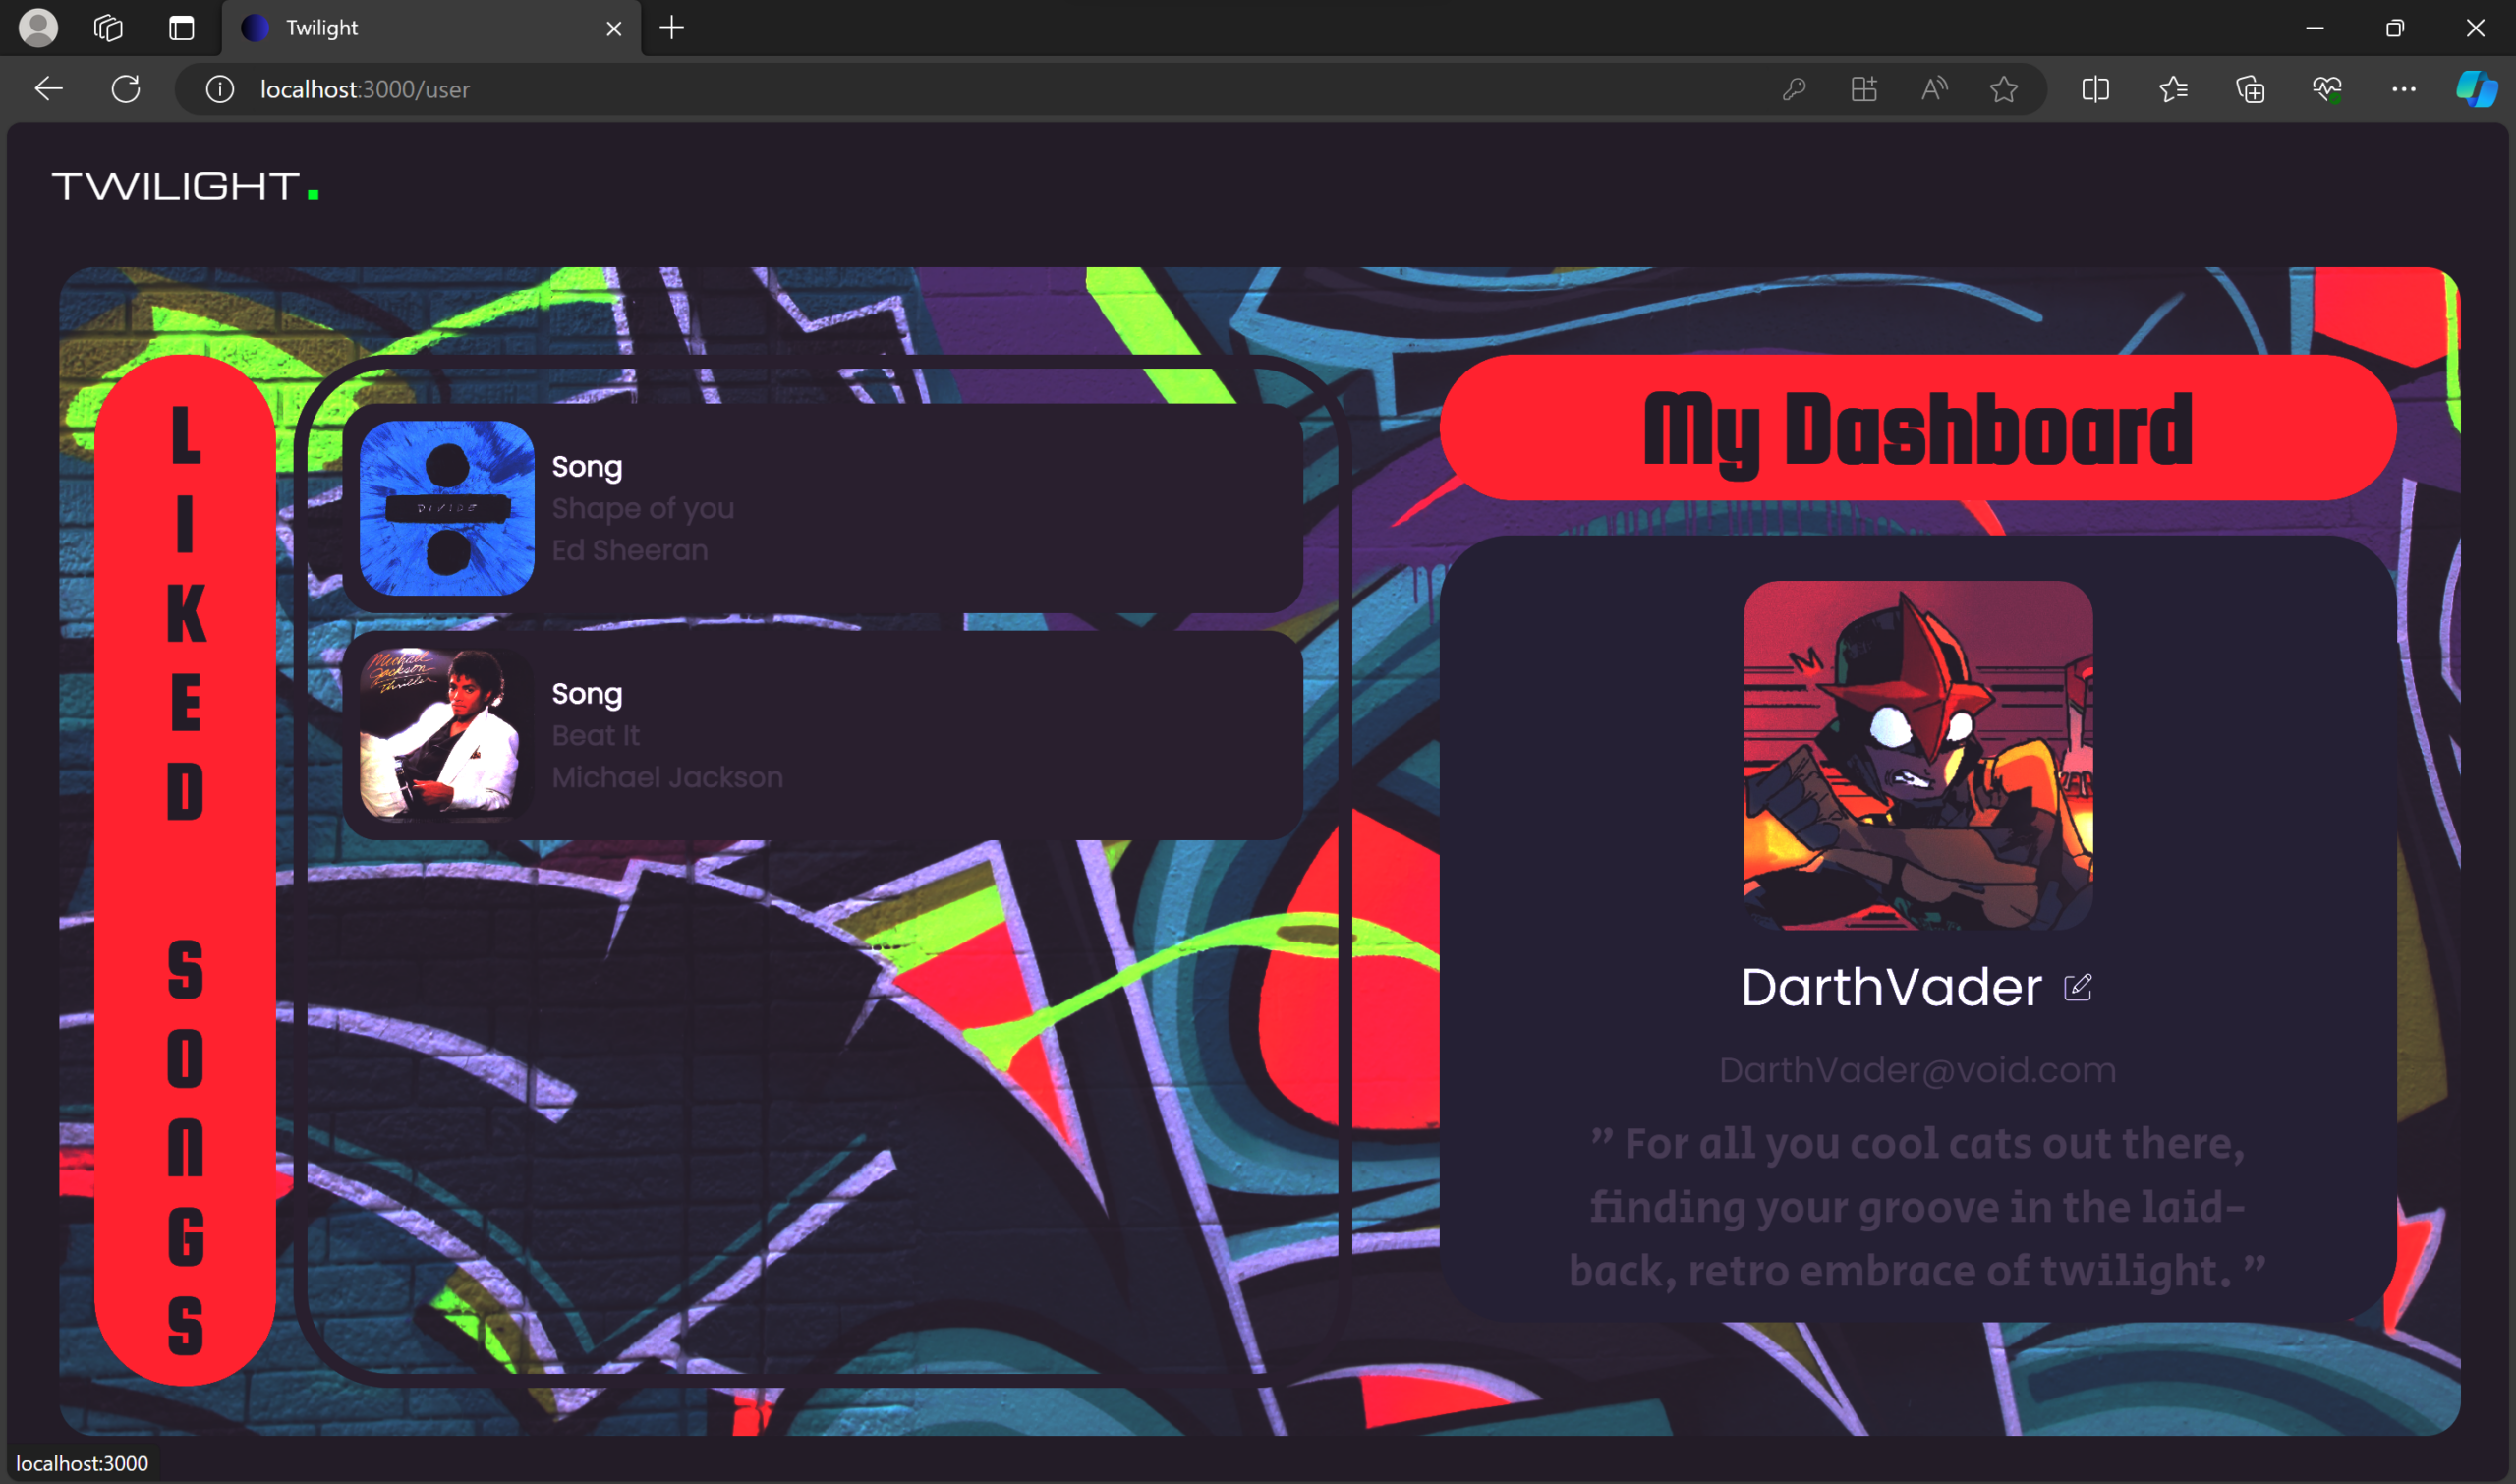
Welcome to Twilight – a digital oasis where music and magic intertwine. Powered by the MERN stack, this sleek platform offers a personalized auditory journey. It’s more than just music; it’s a cosmic concert of cool, where technology and melody perform a nightly serenade just for you.
🚀 Features
🎵 Curate Playlists – Create personalized playlists based on music preferences.
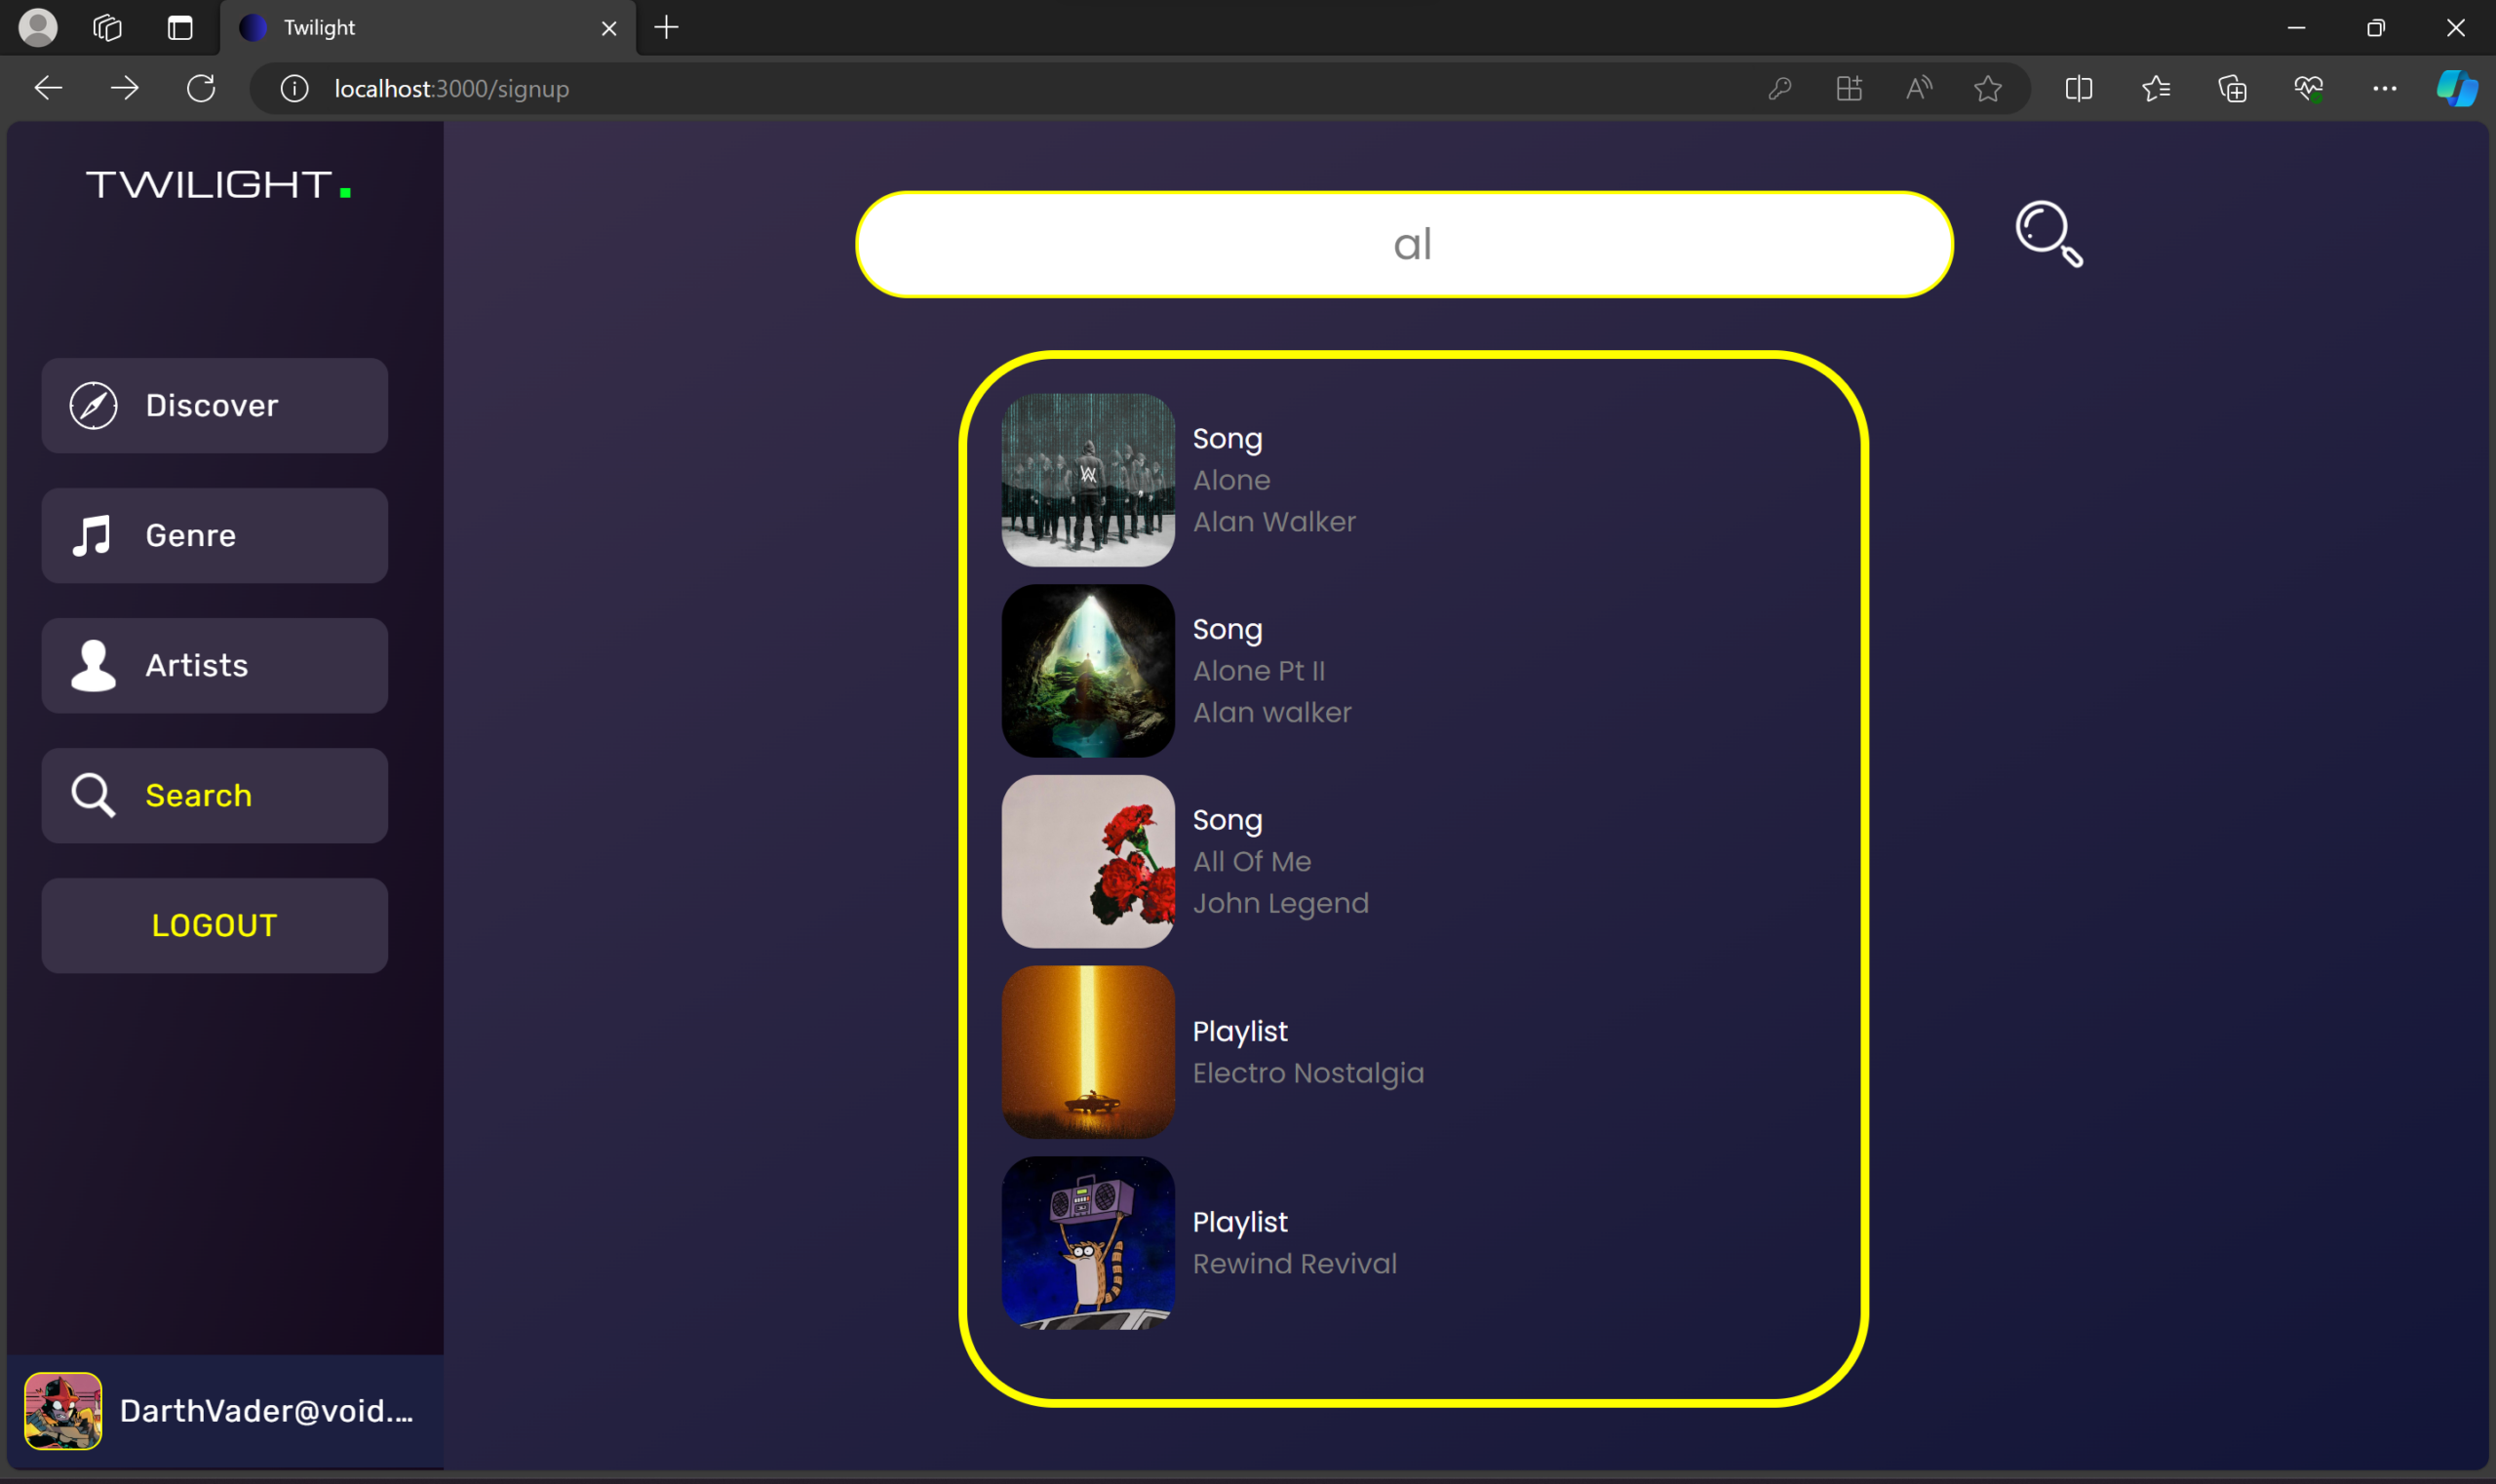
🔍 Powerful Search – Find tracks, albums, or artists instantly.
🎭 Immersive UI – Explore a visually engaging music player.
📌 User Profiles – View favorite songs and get music recommendations.
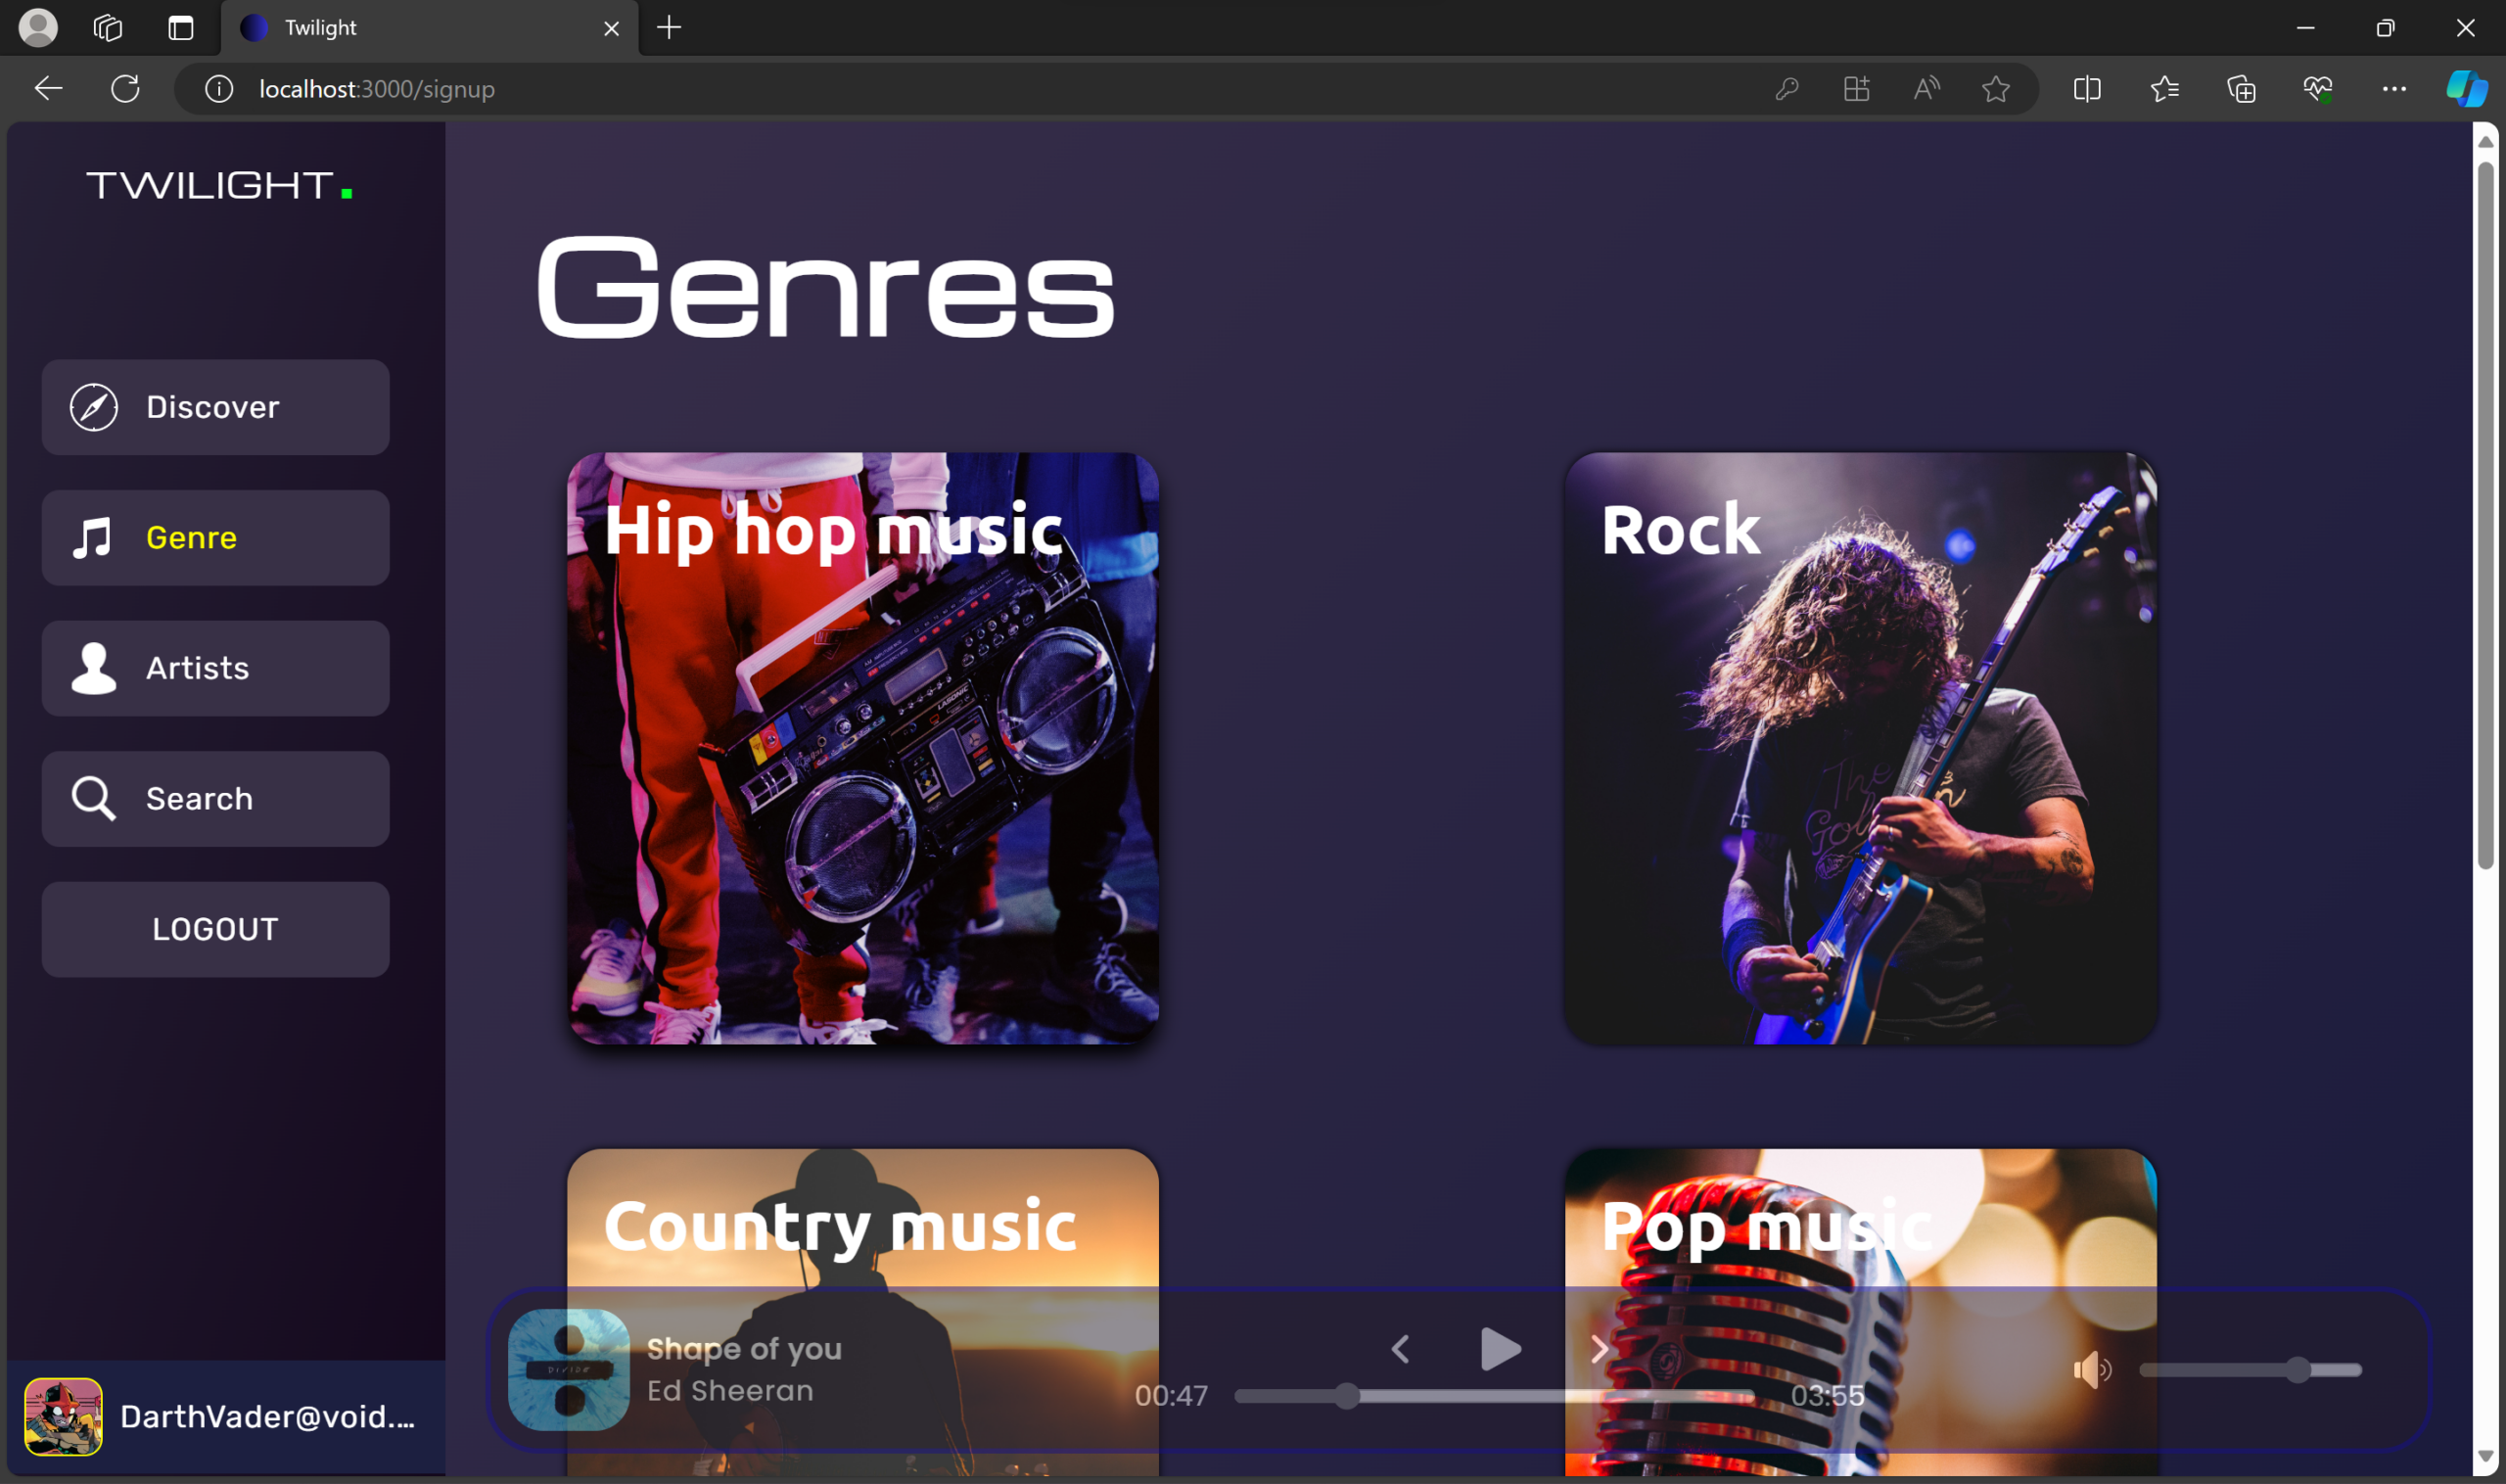
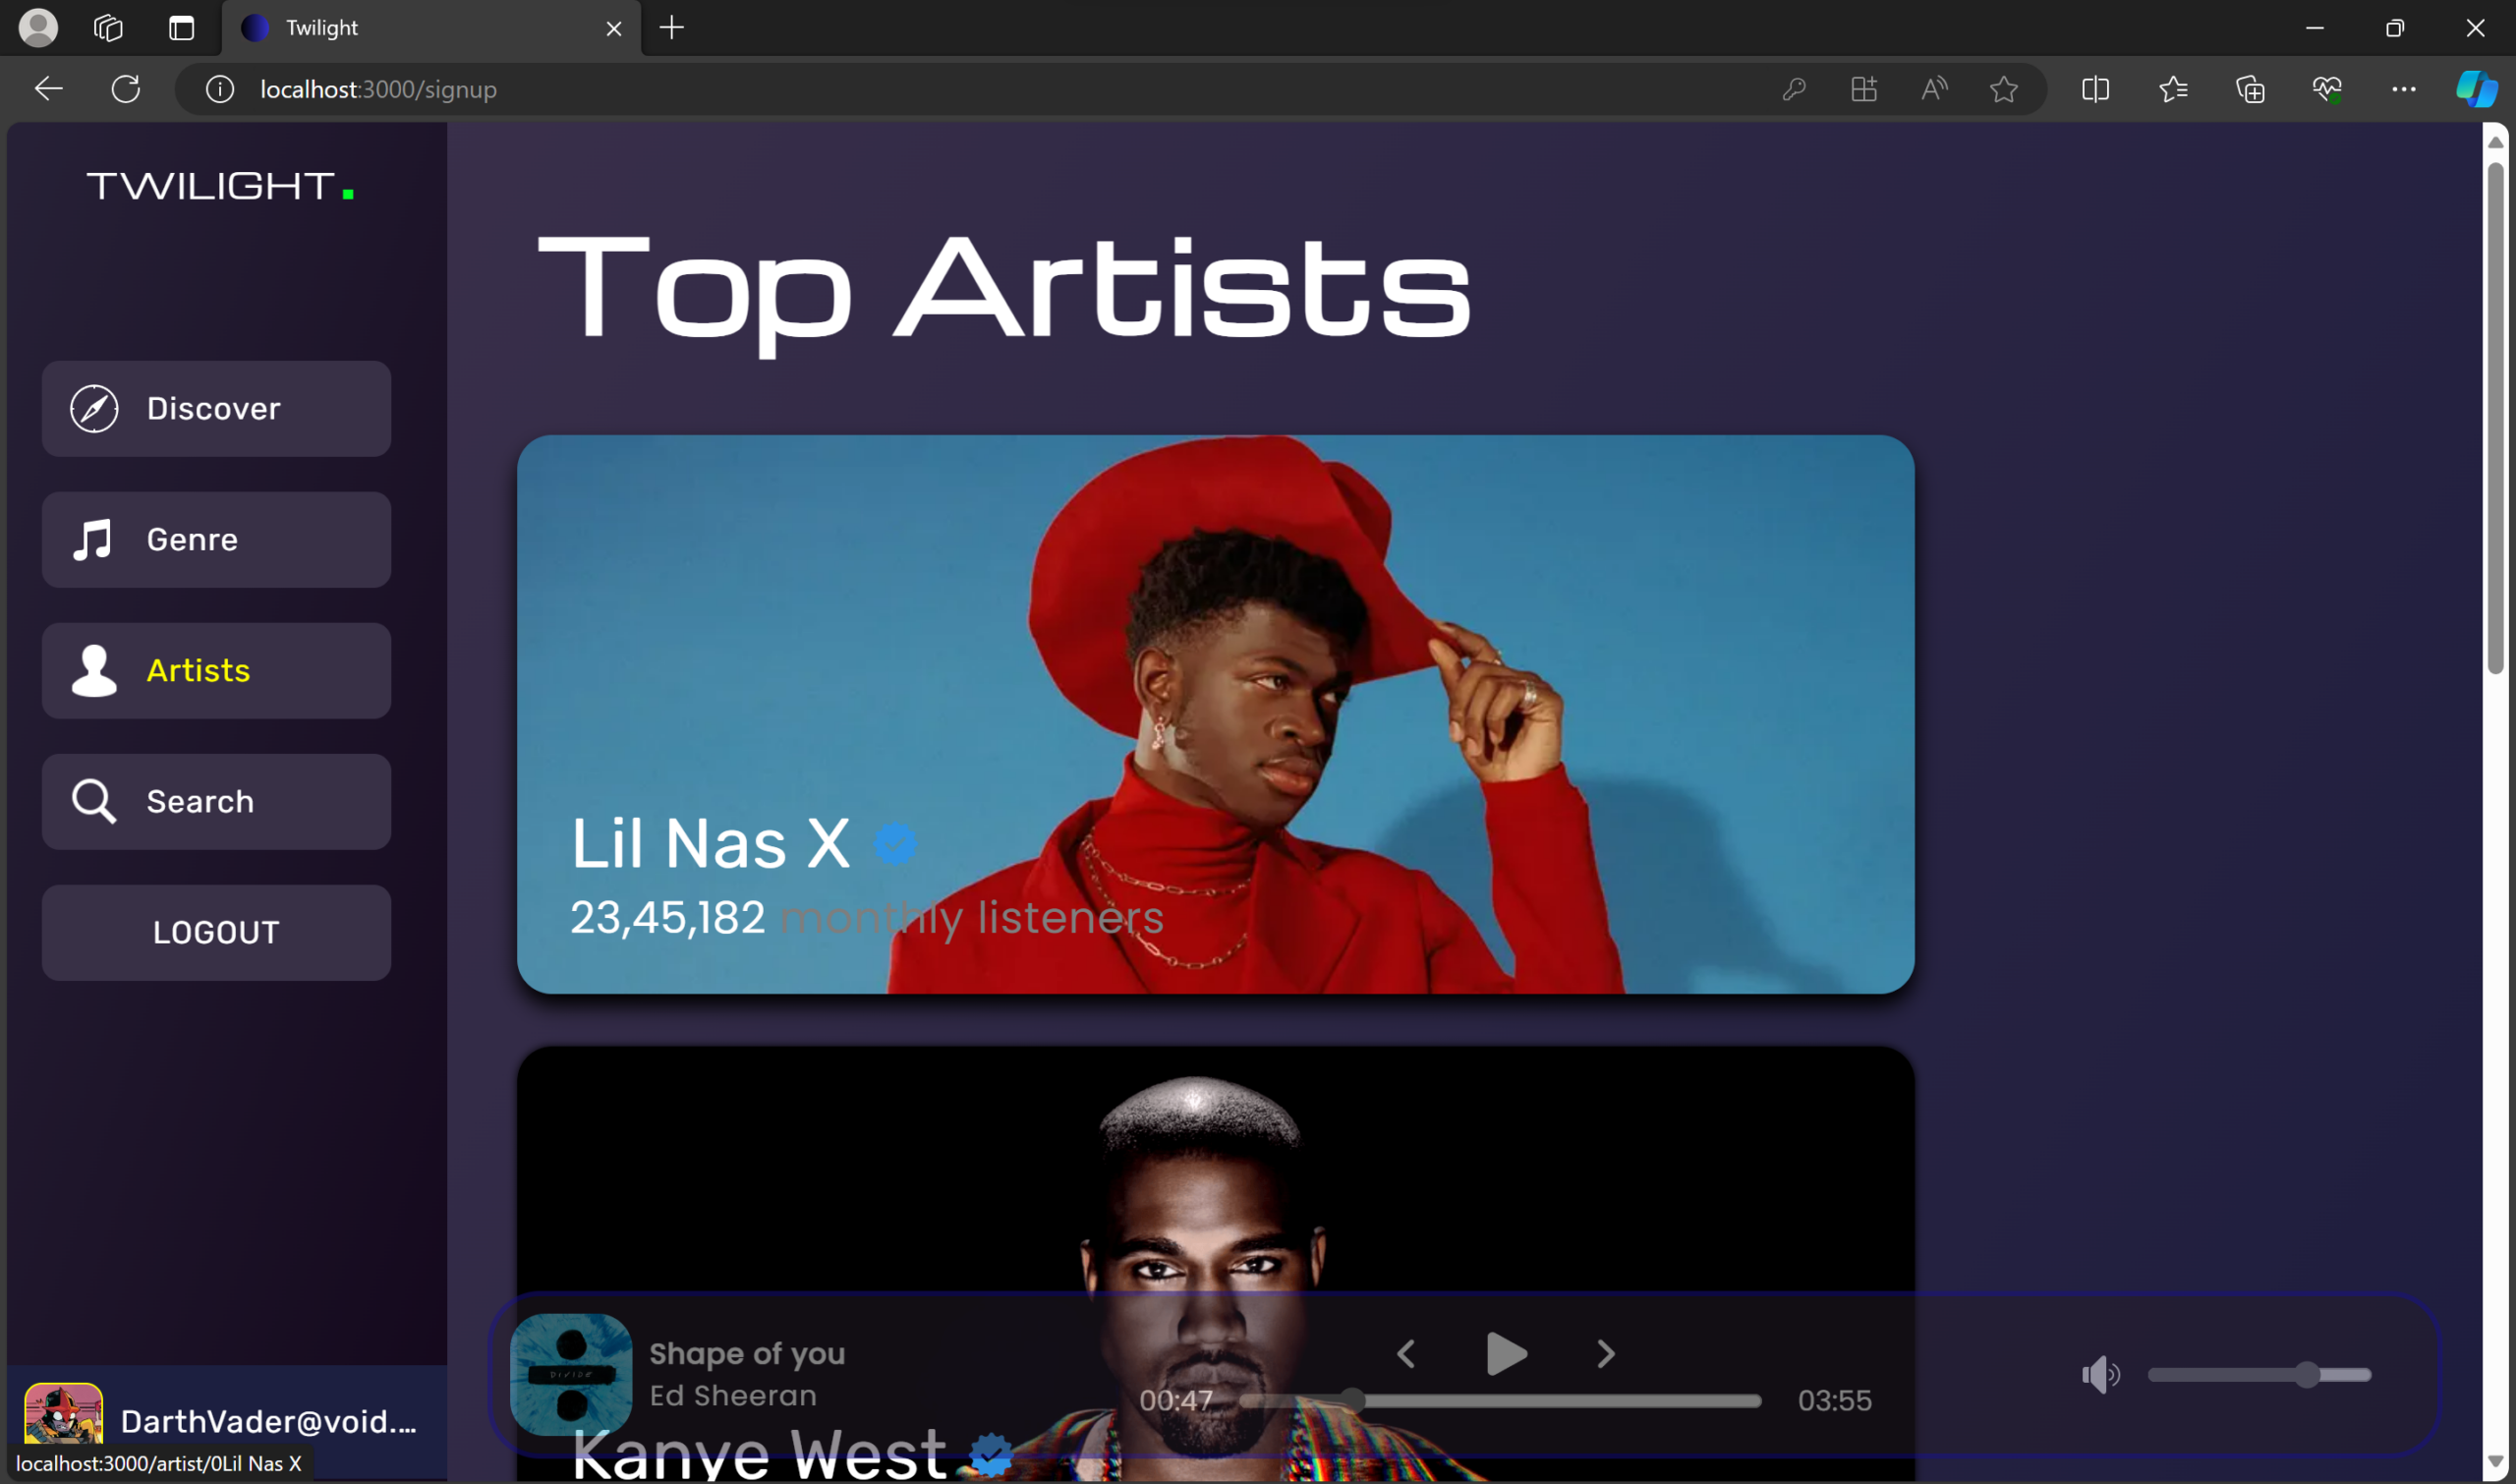
🎨 Genre & Artist Exploration – Discover new music genres and artists interactively.
In the area of bounty-based open-source funding, we see a number of problems and a lot of room for improvements.
1. Discoverability and Promotion
Problem:
Current bounty platforms are “isolated”. If you don’t know them already, you’ll never hear about their bounties. As a developer you need to keep an eye on a confusingly large number of individual solutions with different mechanics and entry barriers, while projects struggle to reach out to developers in an efficient way. Effective promotion is a cruicial factor other plaftforms lack.
Solution:
Octobay builds on heavy social media integration and incentivizing a network of influencers to promote bounties, by monetizing the visibility they can provide on different platforms.
Projects in the Octobay ecosystem are also interconnected based on their dependencies to each other, inviting developers to not only help their favorite projects but also those other projects that it relies on, increasing the network effect.
2. Trust and Delays:
Problem:
Current platforms require manual action to release bounties. Contributors are waiting unnecessarily to receive their payment and maintainers have additional work.
Contributors are also taking the risk of providing working code, that a project might then simply copy and implement, without actually paying the contributor but cancelling the bounty instead.
Solution:
Octobay automates the process, whereever possible, in favor of the contributor. If not specified otherwise by the project, the contributor will be able to withdraw funds as soon as the work done is merged into the project. No additional manual process is required.
Also, in order to place bounties with a higher trust-level, projects can stake funds on the Octobay platform, as a form of collateral. In any case of conflict, managed by our internal governance system, projects can get slashed for misbehaviour. An automated plagiarism-check provides additional indication for missbehaviour.
While established projects already have the neccesary trust, this way also new projects can show their commitment.
3. User Interface and Experience
Problem:
Other platforms don’t hold up with modern standards of user experience. It’s of significant importantance, to be efficient with the user’s cognitive bandwidth and lower the entry barrier. We feel that many bounty platforms (as well as many other apps) are made “for developers, by developers” and that’s the problem. Technical experts should not be responsible for the user experience design.
Solution:
Octobay works with experienced UX design experts and focuses on simplicity and easy of use, while providing “everything you need and nothing you don’t”. Our current prototype already makes a huge difference in these terms, compared to other platforms, and impressively demonstrates how “less is more”.
a game in which two players alternately put crosses and circles in one of the compartments of a square grid of nine spaces.
1、Play tic-tac-toe
2、Displayed when finalized
3、History is saved as the game progresses
4、Review the start history and refer to the previous state of the board
Runs the app in the development mode.
Open http://localhost:3000 to view it in the browser.
The page will reload if you make edits.
You will also see any lint errors in the console.
yarn test
Launches the test runner in the interactive watch mode.
See the section about running tests for more information.
yarn build
Builds the app for production to the build folder.
It correctly bundles React in production mode and optimizes the build for the best performance.
The build is minified and the filenames include the hashes.
Your app is ready to be deployed!
See the section about deployment for more information.
yarn eject
Note: this is a one-way operation. Once you eject, you can’t go back!
If you aren’t satisfied with the build tool and configuration choices, you can eject at any time. This command will remove the single build dependency from your project.
Instead, it will copy all the configuration files and the transitive dependencies (Webpack, Babel, ESLint, etc) right into your project so you have full control over them. All of the commands except eject will still work, but they will point to the copied scripts so you can tweak them. At this point you’re on your own.
You don’t have to ever use eject. The curated feature set is suitable for small and middle deployments, and you shouldn’t feel obligated to use this feature. However we understand that this tool wouldn’t be useful if you couldn’t customize it when you are ready for it.
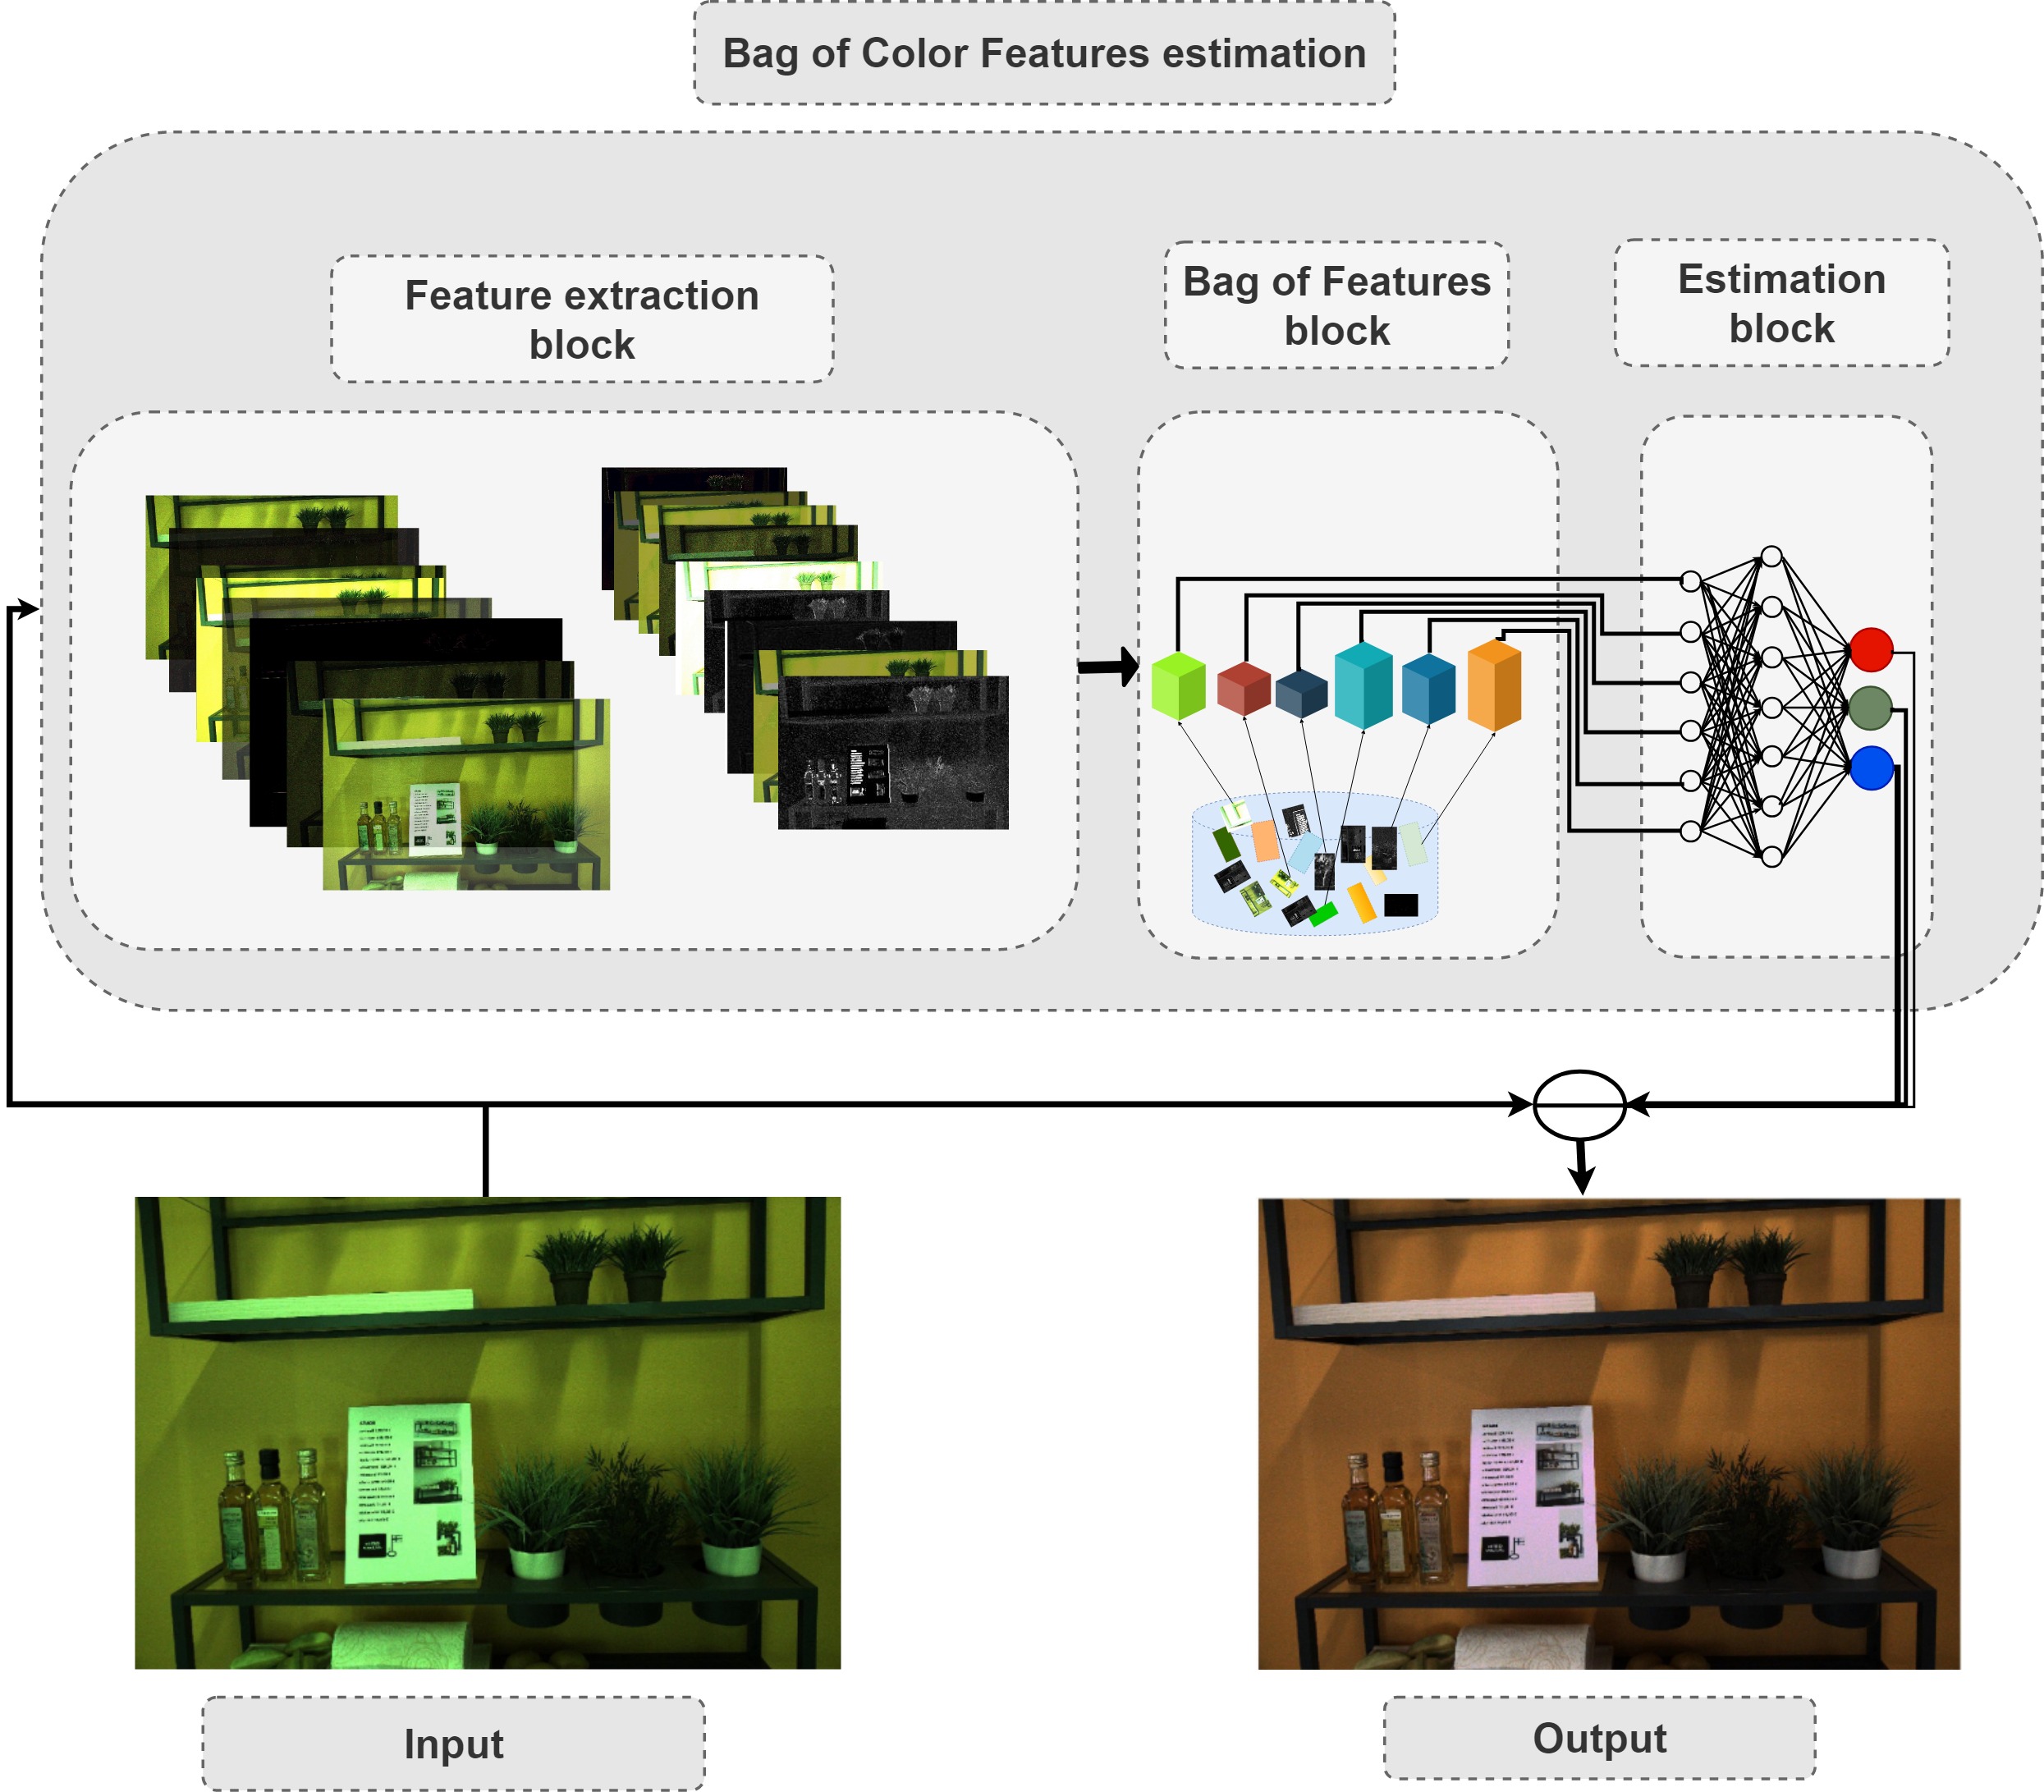
This repository provides the official Tensorflow 2 implimentation of the illuminant estimation algorithm BoCF proposed in paper Bag of Color Features For Color Constancy accepted in IEEE Transactions on Image Processing (TIP) using INTEL-TAU dataset.
BoCF
In this paper, we propose a novel color constancy approach, called BoCF, building upon Bag-of-Features pooling. The proposed method substantially reduces the number of parameters needed for illumination estimation. At the same time, the proposed method is consistent with the color constancy assumption stating that global spatial information is not relevant for illumination estimation and local information (edges, etc.) is sufficient. Furthermore, BoCF is consistent with color constancy statistical approaches and can be interpreted as a learning-based generalization of many statistical approaches.
BoCF consists of three main blocks: feature extraction block, Bag of Features block, and an estimation block. In the first block, regular convolutional layers are used to extract relevant features. Inspired by the assumption that second order gradient information is sufficient to extract the illumination information, we use only two convolutional layers to extract the features. In the second block, i.e., the Bag of Features block, the network learns the dictionary over the non-linear transformation provided by the first block. This block outputs a histogram representation, which is fed to the last component, i.e., the estimation block, to regress to the scene illumination.
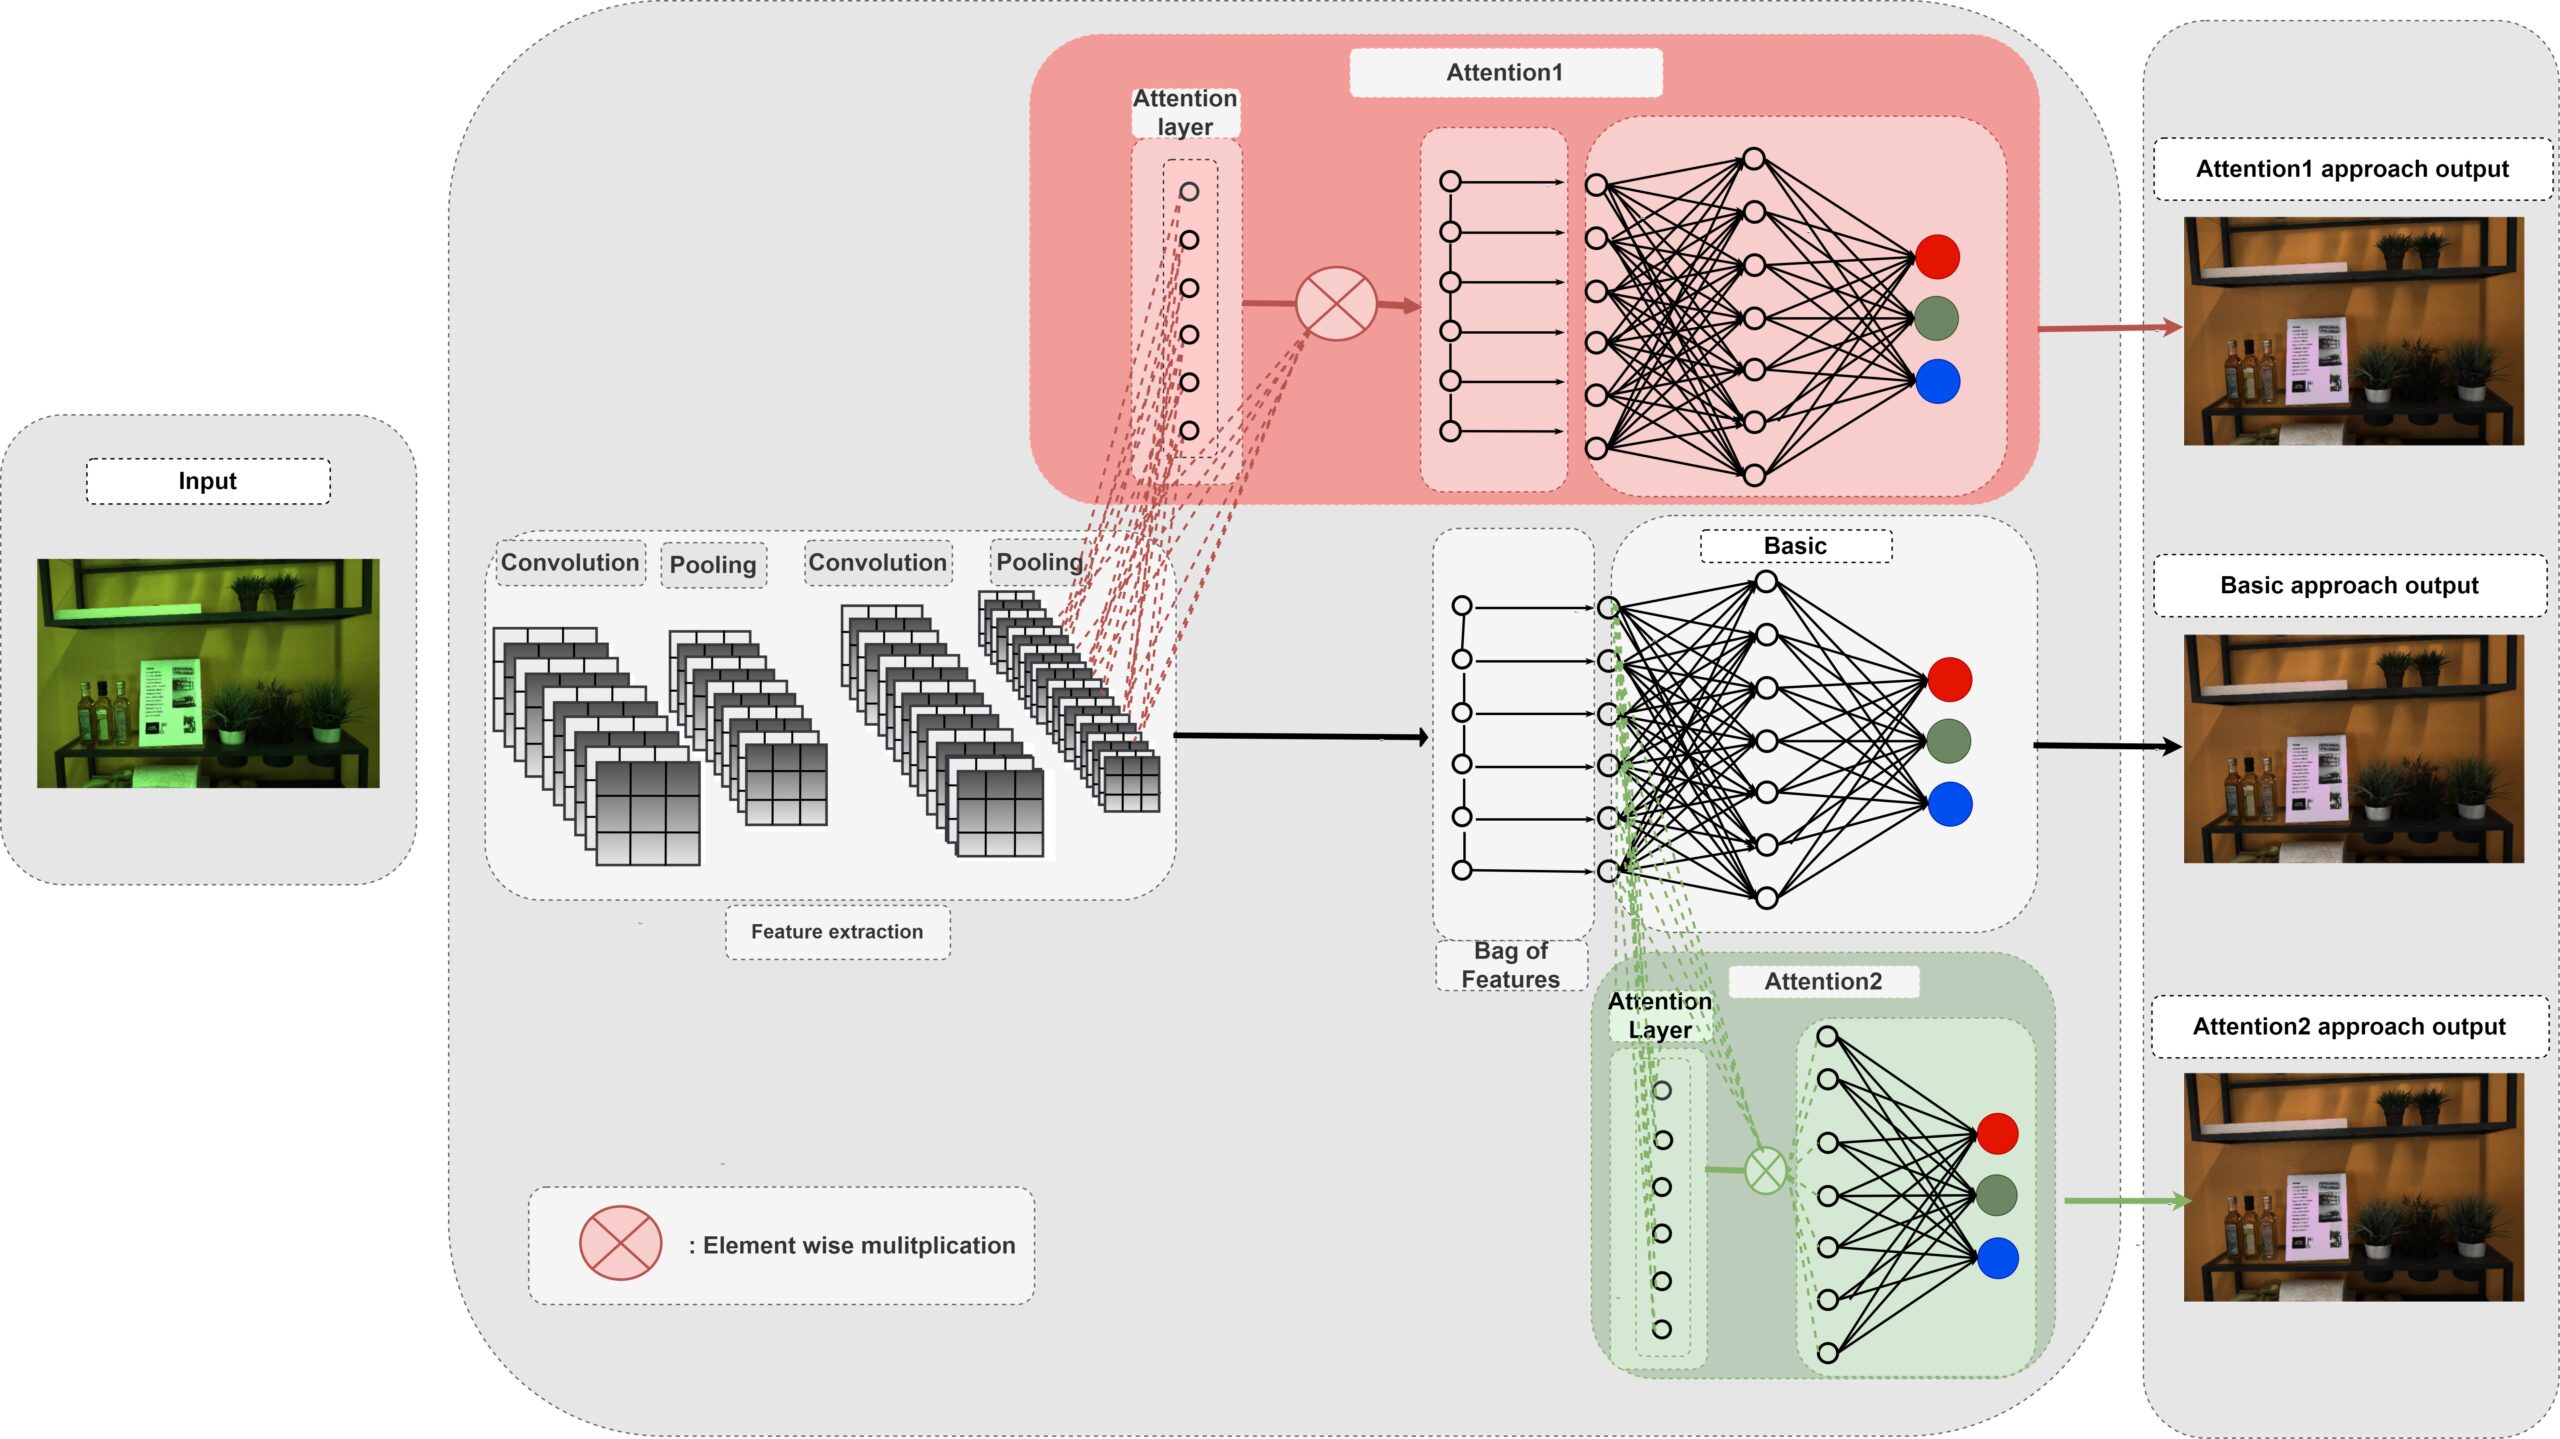
To further improve the illumination estimation accuracy, we propose a novel attention mechanism for the BoCF model with two variants based on self-attention. In the first variant (Attention1), we add an attention mechanism between the feature extraction block and the Bag of Features block. This mechanism allows the network to dynamically select parts of the image to use for estimating the illumination, while discarding the remaining parts. Thus, the network becomes robust to noise and irrelevant features. In the second variant (Attention2), we add an attention mechanism on top of the histogram representation, i.e., between the Bag of Features block and the estimation block. In this way, we allow the network to learn to adaptively select the elements of the histogram which best encode the illuminant information. The model looks over the whole histogram after the spatial information has been discarded and generates a proper representation according the current context (histogram).
Usage
INTEL-TAU Dataset
INTEL-TAU dataset is the largest publicly available illumination estimation dataset. It is composed of 7022 scenes in total. The variety of scenes captured using three different camera models, i.e., Canon 5DSR, Nikon D810, and Sony IMX135, makes the dataset appropriate for evaluating the camera and scene invariance of the different illumination estimation techniques.
Dependencies
The project was tested in Python 3. Run pip install -r requirements.txt to install dependent packages.
Using our codes.
1/ Download the preprossed 1080p TIFF variant of the dataset.
2/ Set the root path variable in main_BoCF.py to your data path, e.g., ‘root_path’: ‘/mnt/Data/Firas2/Intel_v3/processed_1080p’
3/ Run the script main_BoCF.py : python3 main_BoCF.py
Walking through the main code (main_BoCF.py):
1/ First a dataset class is created using the paramters
3/ We augment the training and validation data relative to the current fold and save the augmented dataset relative to the fild in the aug_path.
Note1: This step is only excuted in case the augmented dataset folder does not exist.
Note2: Don’t stop the code in the middle of this step. In case the code was stopped before this step is finished, the aug_path folder needs to be deleted manually.
4/ We create a BoCF model. There are two hyper-parameters: histogram_size (default=150) and attention_variant (default=2). If attention_variant needs to be changed to 1 to use attention1 variant or 0 to test the standard approach without attention.
model = BoCF(n_codewords = hist_size , show_summary= True,attention =attention_variant)
5/ Training the model and testing it using the test set
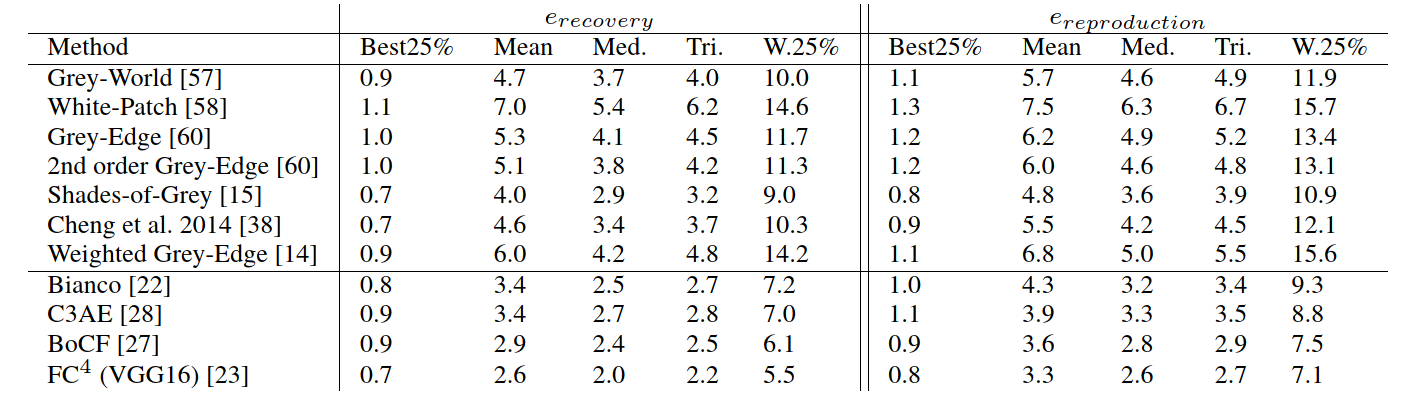
The numirical results of the different approaches on INTEL-TAU datasets. We report the different statistics of the Recovery and Reproduction errors using the 10-fold cross validation protocol.
We also provide some visual results of BoCF on three samples from INTEL-TAU. From left to right, the input image, the corrected images with BoCF method, and the ground truth image.
Cite This Work
@article{laakom2020bag,
  title={Bag of color features for color constancy},
  author={Laakom, Firas and Passalis, Nikolaos and Raitoharju, Jenni and Nikkanen, Jarno and Tefas, Anastasios and Iosifidis, Alexandros and Gabbouj, Moncef},
  journal={IEEE Transactions on Image Processing},
  volume={29},
  pages={7722--7734},
  year={2020},
  publisher={IEEE}
}

@article{laakom2021intel,
  title={Intel-tau: A color constancy dataset},
  author={Laakom, Firas and Raitoharju, Jenni and Nikkanen, Jarno and Iosifidis, Alexandros and Gabbouj, Moncef},
  journal={IEEE Access},
  volume={9},
  pages={39560--39567},
  year={2021},
  publisher={IEEE}
}
Note: This repository contains the course microservice of the Sumé LMS. If you are looking for more information
about the application, we strongly recommend you to check the documentation.
Sumé LMS is a modern and open-source learning management system that uses modern technologies to deliver performance
and scalability to your learning environment.
Access the project folder, and download the Go dependencies
$ go get ./...
It may take a while to download all the dependencies, then you are ready to build.
Building
There are two ways that you can use to build this microservice. The first one will build it using your own machine,
while the second one will build it using a container runtime. Also, you can build the container image to use it with
Docker or Podman, but it is up to you.
Here are the following instructions for each available option:
Local build
It should be pretty simple, once all the dependencies are download just run the following command:
$ make build
It will generate an executable file at the /bin directory inside the project folder, and probably you want to know
how to run it.
Container build
At this point, I’ll assume that you have installed and configure the container runtime (Docker or Podman) in your system.
You can have your local database running the following command:
$ docker-compose up -d postgres
And then you could run the migrations using
$ make migration-up
Note
You will have to install the golang-migrate tool
It uses the same environment variables from the configuration section.
Running
OK! Now you build it you need to run the microservice. That should also be pretty easy.
Local run
If you want to run the microservice locally, you may need to have a Postgres instance running and accessible
from your machine, and you may need to first configure it. Then you can run it, you just need to
execute the following command:
If you want to run the microservice using a container runtime, the easiest way to do it is using the docker-composer
or podman-compose.
All that you need to do is, execute the command:
$ make compose-up
It should create 2 containers, one that runs the microservice and another that runs the Postgres. If you already
have your own Postgres instance you can only run the microservice container:
$ make container-run
Keep in mind that, in both cases, it will load the config/config.yml file from the project. If you want to change some
configurations you can set the environment variables in your docker-compose.yml file, or edit the configuration file.
You can easily configure the application editing the config/config.yml file or using environment variables. We do
strongly recommend that you use the configuration file instead of the environment variables. Again, it is up to you
to decide. If you want to use the variables, be sure to prefix it all with SUMELMS_.
The list of the environment variables and it’s default values:
We are using configuro to manage the configuration, so the precedence
order to configuration is: Environment variables > .env > Config File > Value set in Struct before loading.
Testing
You can run all the tests with one single command:
$ make test
Documentation
The complete Sumé LMS documentation can be found in our official website.
API
This project uses Swagger to generate the API documentation and API mockup, the files can be
found swagger directory.
Sometimes, a microservice can cover more than one domain boundary, in this case, the API scheme should be stored in the
same directory indicated above, but following the following filename convention: <domain-name>-api.yaml
The best way to edit the API scheme is by using the Swagger Editor.
Contributing
Thank you for considering contributing to the project. In order to ensure that the Sumé LMS community is welcome to
all make sure to read our Contributor Guideline.
Code of Conduct
Would you like to contribute and participate in our communities? Please read our Code of Conduct.